Transforming your living space into a breathtaking, cozy sanctuary doesn’t require a massive budget or a team of professional interior designers. With a splash of creativity, a few accessible crafting supplies, and a handful of spare hours, you can create high-end home decor that rivals designer boutique collections.
Below is an extensive, step-by-step guide featuring 20 budget-friendly DIY home decor projects. Each project breaks down what the design concept means, the exact materials you need, clear crafting steps, and clever design variations to suit your unique aesthetic.



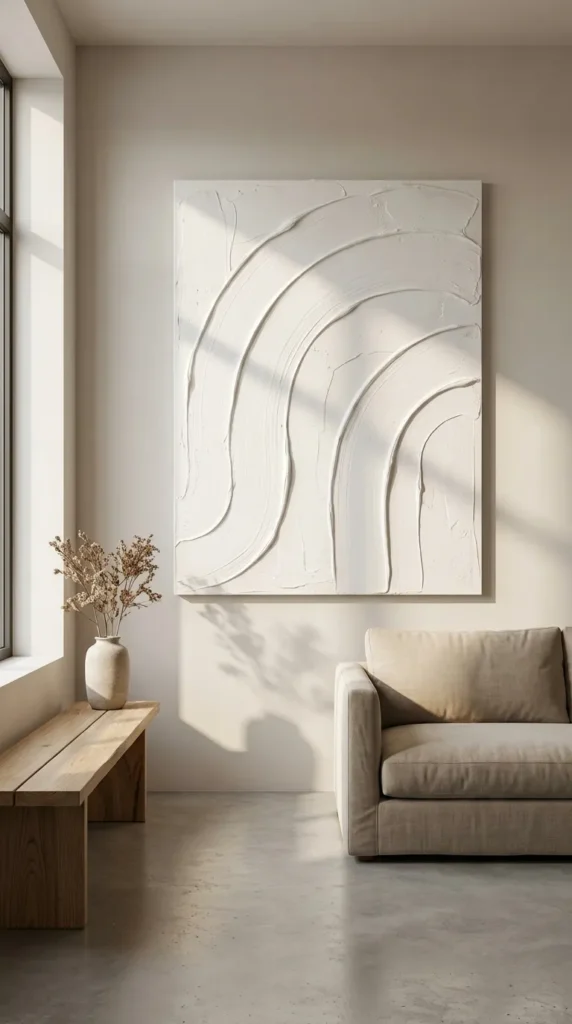
1. Textured Plaster Canvas Art
What This Idea Means
Textured plaster canvas art brings high-end, minimalist gallery vibes into your home. Using joint compound or plaster on blank stretched canvases creates dimensional, tactile art that plays beautifully with light and shadow.
Supplies Needed
- Blank stretched canvas (any size)
- Pre-mixed joint compound or spackle
- Putty knife or notched trowel
- Acrylic paint (neutral tones like beige, off-white, or muted gray)
- Paintbrushes
- Fine-grit sandpaper
How to Make It
- Prep the Canvas: Place your canvas on a flat, protected work surface.
- Apply Plaster: Scoop a generous amount of joint compound onto the center of the canvas using your putty knife.
- Create Texture: Spread the compound across the canvas. Use a notched trowel, an old comb, or the edge of the knife to sweep arching lines, geometric waves, or organic swirls into the plaster.
- Let Dry: Allow the plaster to dry completely for 24 hours.
- Sand Smooth: Gently sand down any overly sharp peaks with fine-grit sandpaper.
- Paint: Coat the canvas with your favorite matte neutral paint to unify the texture, or leave subtle shade variations for depth.
Tips & Variations
- Tip: Seal the finished artwork with a matte clear coat to prevent chipping.
- Variation: Add powdered pigment directly into the joint compound before applying it for built-in, earthy color.
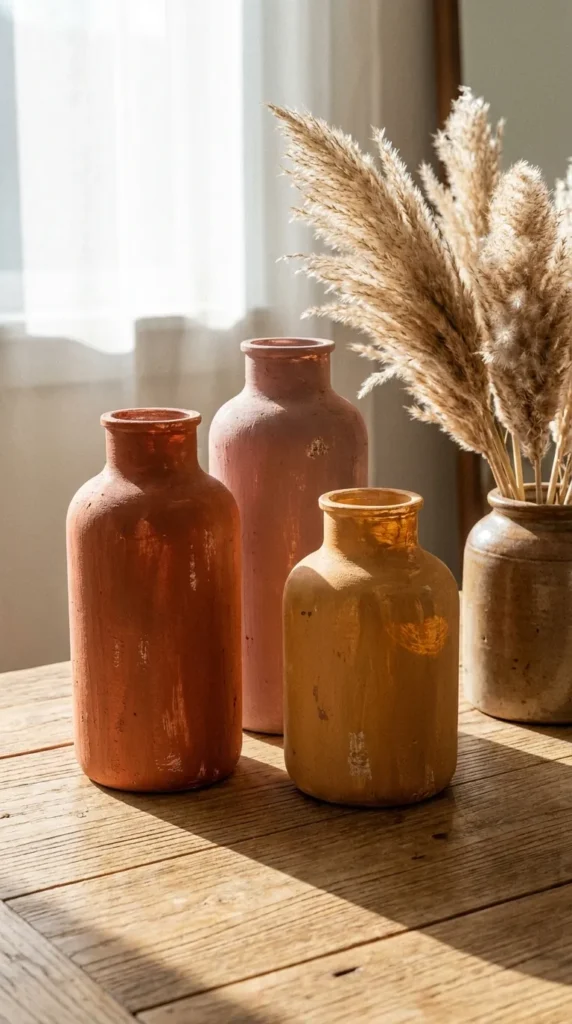
2. Upcycled Glass Bottle Vases with Clay Texture
What This Idea Means
Instead of tossing out glass jars or beverage bottles, turn them into luxury ceramic-look vases. Coating glass with baking soda-infused paint or air-dry clay creates an elegant stoneware look for pennies.
Supplies Needed
- Clean glass bottles or mason jars
- Air-dry clay or baking soda mixed with acrylic paint
- Foam paintbrushes
- Matte varnish spray
How to Make It
- Clean Glass: Wash and thoroughly dry your glass bottles, removing all labels and adhesive.
- Prepare Paint: Mix 1 cup of matte acrylic paint with 2 tablespoons of baking soda to create a chalky, terracotta-like paste.
- Apply First Coat: Dab the paint mixture over the bottle using a foam brush in broad strokes.
- Build Layers: Allow the first coat to dry for 30 minutes, then apply a second layer for total coverage.
- Seal: Once fully dry, spray with a matte clear sealer to protect the faux ceramic texture.
Tips & Variations
- Tip: Dab rather than stroke the brush to build an authentic ceramic grit.
- Variation: Wrap thin strips of air-dry clay around the neck or body of the bottle before painting to add organic ridges or handles.
3. Wooden Bead Garland with Tassels
What This Idea Means
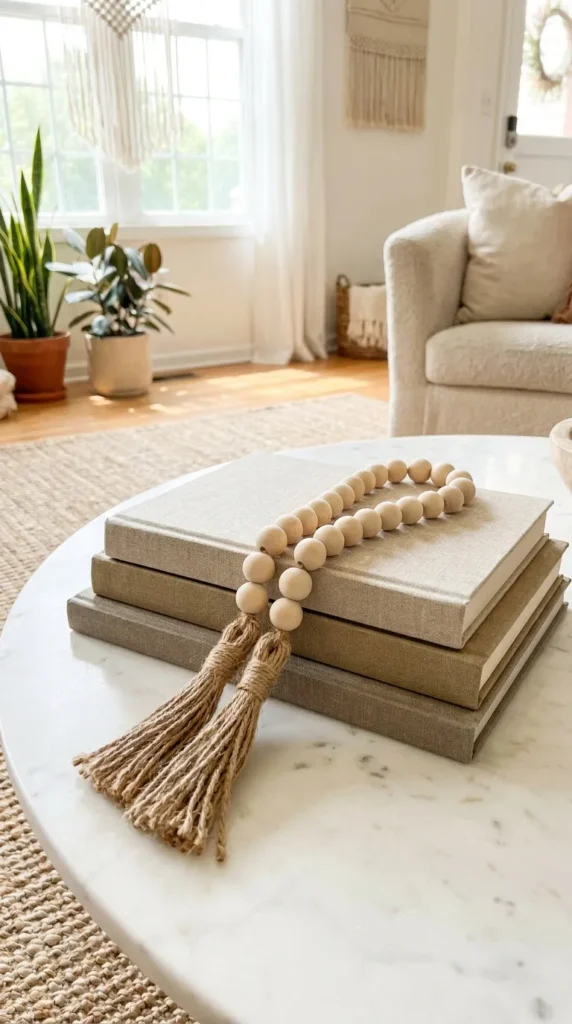
Wooden bead garlands are staple accents in boho, Scandinavian, and modern farmhouse decor. Draped over coffee table books, wrapped around planter pots, or styled in decorative bowls, they add warmth and soft texture.
Supplies Needed
- Unfinished wooden beads (assorted sizes)
- Jute twine or cotton cord
- Scissors
- Tape
How to Make It
- Measure Cord: Cut a length of jute cord approximately 4 to 5 feet long. Wrap tape around one end to prevent fraying while stringing.
- String Beads: Thread your wooden beads onto the cord in an alternating size pattern (e.g., two small, one large).
- Make Tassels: Wrap jute cord around your hand 20 times. Slide it off, tie a knot at the top loop, cut the bottom loops open, and wrap another string around the neck to secure it.
- Attach Tassels: Tie a tassel securely to each end of the bead strand and trim excess cord.
Tips & Variations
- Tip: Dip half of the beads into acrylic paint or wood stain before stringing for a custom two-tone effect.
- Variation: Add felt balls or tassels made from colorful yarn instead of jute for a nursery or playroom.
4. Faux Arch Wall Paint Accent
What This Idea Means
Painted arches add architectural interest, define specific zones (like a entryway landing or desk nook), and create an eye-catching focal point without the expense of real woodwork.
Supplies Needed
- Sample pot of interior wall paint
- Painter’s tape
- String, a pencil, and a thumbtack
- Medium paint roller and angled brush
How to Make It
- Measure Base: Map out the width of your arch on the wall using painter’s tape for the two vertical sides.
- Mark Arch Top: Find the center point between the top of the vertical lines. Insert a thumbtack at this point.
- Draw Arch: Tie a string to the thumbtack, adjust the length to match half your arch width, tie a pencil to the end, and swing the string in a semi-circle to draw a clean top arch.
- Tape & Paint: Use small pieces of painter’s tape or a steady hand with an angled brush to trace the curved pencil line.
- Fill In: Roll paint inside the arch boundaries, applying two coats for solid coverage.
Tips & Variations
- Tip: Remove painter’s tape while the second coat of paint is still slightly damp to get crisp, clean edges.
- Variation: Paint two overlapping arches in complementary tones (like terracotta and dusty rose) for a modern mid-century look.
5. Pressed Botanical Floating Frames
What This Idea Means
Preserving delicate leaves, fern fronds, or wildflowers inside glass floating frames brings natural elegance into your home while serving as custom botanical wall art.
Supplies Needed
- Double-glass floating picture frames
- Pressed dried flowers or leaves
- Tweezers
- Clear craft glue (optional)
How to Make It
- Collect & Press: Collect fresh leaves or flowers, flatten them between parchment paper, and place them inside a heavy book for 1–2 weeks until completely dry.
- Arrange: Open your glass floating frame and lay out the dried greenery using tweezers to avoid oils from your fingers getting on the glass.
- Secure: Place a micro-dot of clear craft glue on the back of each botanical stem to prevent shifting.
- Close Frame: Carefully lower the top glass panel over the arrangement and lock the frame.
Tips & Variations
- Tip: Choose foliage with varied shapes and rich greens—like eucalyptus, monstera leaves, or delicate maidenhair ferns.
- Variation: Arrange herbs like lavender and rosemary to create a charming culinary-themed gallery set for the kitchen.
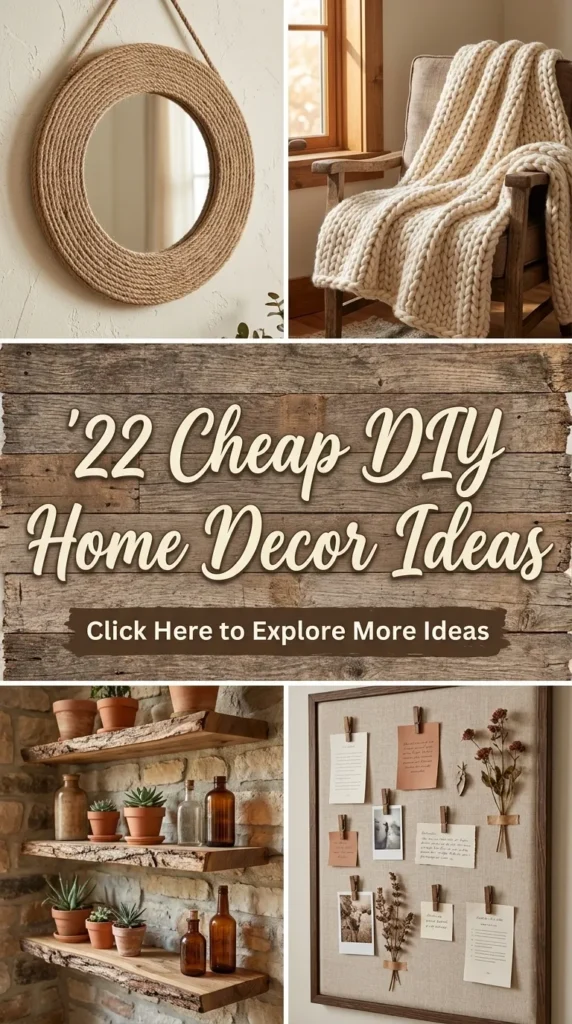
6. Twine-Wrapped Hanging Mirror
What This Idea Means
Giving a plain, inexpensive round mirror a custom nautical or boho upgrade using thick rope or twine adds texture and rustic charm to entryways, bathrooms, or bedrooms.
Supplies Needed
- Simple round mirror with flat edges
- Thick jute rope or cotton piping cord
- Hot glue gun and glue sticks
- Picture hanging hardware
How to Make It
- Prep Mirror: Place the mirror face-up on a clean, scratch-free towel.
- Glue First Ring: Run a bead of hot glue along the outer rim of the mirror frame and press the start of your rope securely into place.
- Coil Layers: Continue coiling the rope around the mirror edge, gluing as you go, adding 3 to 5 concentric circles of rope to create a wide frame.
- Create Hanging Loop: Leave a long loop of rope at the top center to serve as a decorative hanging loop before cutting and gluing the end neatly at the back.
Tips & Variations
- Tip: Use a glue gun with high-temperature glue to ensure the heavy rope stays permanently secured.
- Variation: Paint the rope solid black or white with spray paint for a sleek modern contrast.
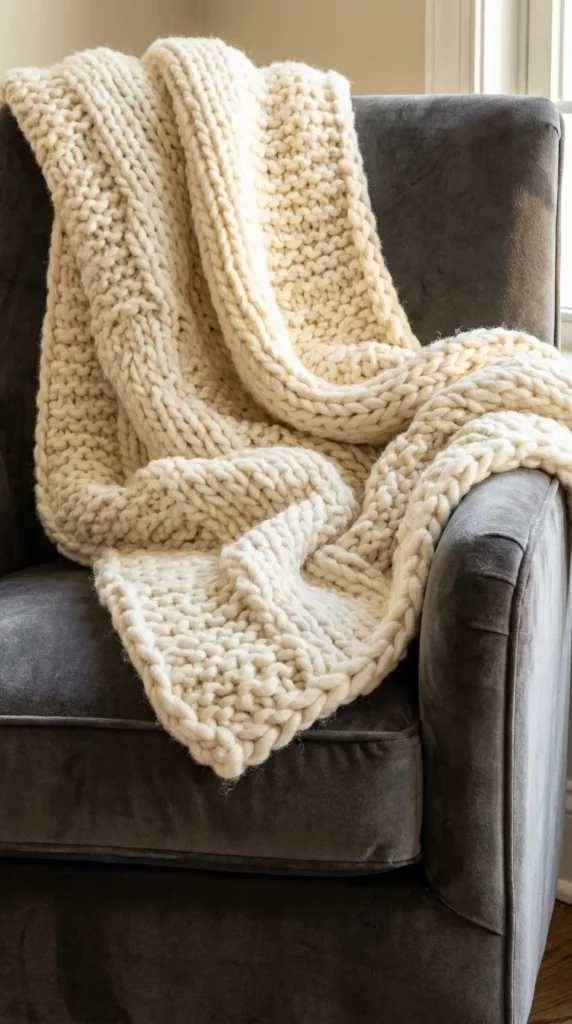
7. Chunky Knit Throw Blanket
What This Idea Means
Chunky hand-knit blankets add soft luxury and texture to sofas and beds. By using arm-knitting techniques with chenille or roving wool yarn, you can craft one in just a couple of hours without knitting needles.
Supplies Needed
- 4 to 6 skeins of jumbo/chunky chenille yarn
- Scissors
- A large flat surface (like a clean floor or table)
How to Make It
- Slip Knot: Create a slip knot at the end of your yarn, leaving a short tail.
- Cast On: Pull loops through your working yarn to create a foundation chain of approximately 25 to 30 loops (determines blanket width).
- Row 1: Working back along the chain, pull a loop of working yarn up through each chain loop, keeping loop height consistent (about 2 inches high).
- Continue Weaving: Work back and forth across rows, pulling new loops through existing loops.
- Bind Off: When desired length is reached, pass the first loop over the second, pulling working yarn through to create a finished edge, and weave in the tail.
Tips & Variations
- Tip: Keep loop sizes consistent throughout the process so the weave stays neat and uniform.
- Variation: Alternate two complementary yarn colors every few rows to create bold horizontal stripes.
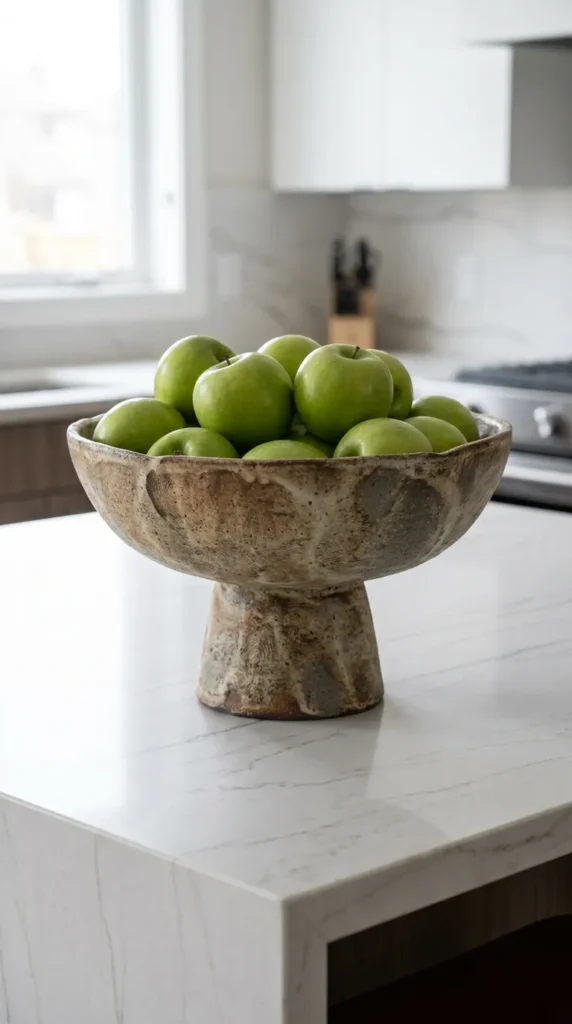
8. Faux Pedestal Bowl Made of Clay
What This Idea Means
Fluted, pedestal bowls are trending in luxury interior design. You can easily sculpt one using air-dry clay or by attaching a cheap glass bowl to an inverted candlestick base.
Supplies Needed
- Air-dry clay (or a glass bowl + candle holder)
- Clay tools or a butter knife
- Sandpaper
- Matte acrylic spray paint (granite or stone texture)
How to Make It
- Form Bowl: Roll air-dry clay into a smooth sheet and drape over a plastic-wrapped kitchen bowl to create the top bowl shape.
- Form Base: Sculpt a short, thick cylinder or cone to act as the pedestal foot.
- Join Pieces: Score both connection surfaces with cross-hatch marks, add water, and press the bowl and base firmly together.
- Dry & Sand: Allow to cure completely for 48 hours, then sand smooth.
- Paint: Spray with textured stone paint for a authentic marble or concrete aesthetic.
Tips & Variations
- Tip: Wet your fingers slightly with water to smooth out cracks and fingerprints while shaping the clay.
- Variation: Create vertical fluted ridges along the outside of the bowl using a clay tool before drying.
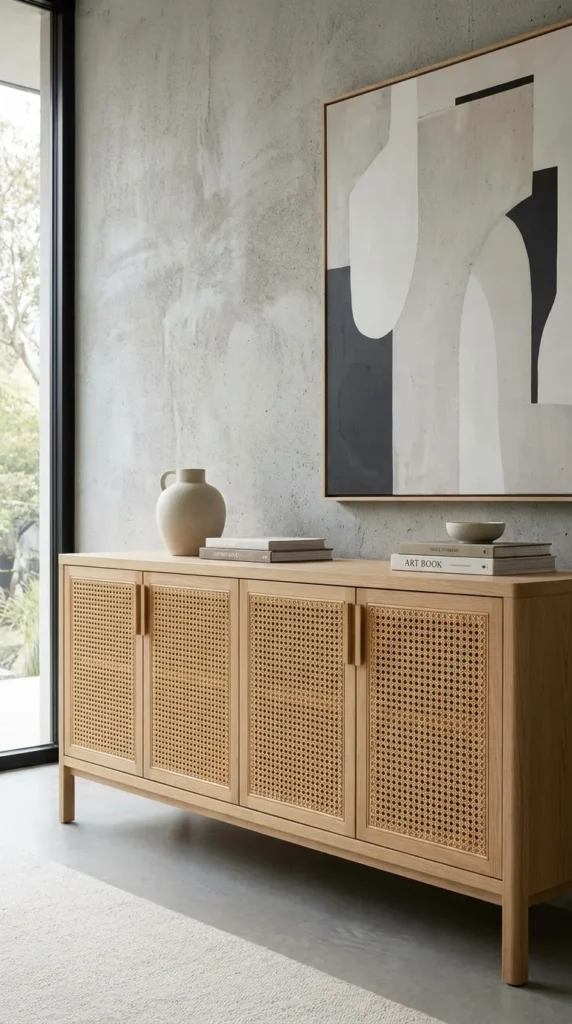
9. DIY Cane Webbing Cabinet Upgrade
What This Idea Means
Upcycling basic flat-panel cabinets or thrifted nightstands with woven rattan cane webbing infuses instantly rich texture, mid-century warmth, and vintage appeal into any room.
Supplies Needed
- Woven cane webbing roll
- Wooden picture frame or cabinet door with hollow center
- Heavy-duty staple gun
- Utility knife or sharp shears
- Warm water basin
How to Make It
- Soak Cane: Soak your cane webbing in warm water for 30 minutes to make it pliable and easy to work with.
- Cut to Size: Measure the back opening of your cabinet door and cut the cane with a 1-inch overlap on all sides.
- Staple in Place: Pull the damp cane tightly across the back of the frame, stapling it in place starting from the center out to the corners.
- Trim & Dry: Trim excess cane with a utility knife. As the cane dries, it will shrink slightly and pull completely taut.
Tips & Variations
- Tip: Never skip the soaking step; wet cane stretches smoothly without tearing and tightens naturally as it dries.
- Variation: Paint the surrounding wooden cabinet frame matte charcoal black for a striking modern contrast against natural cane.
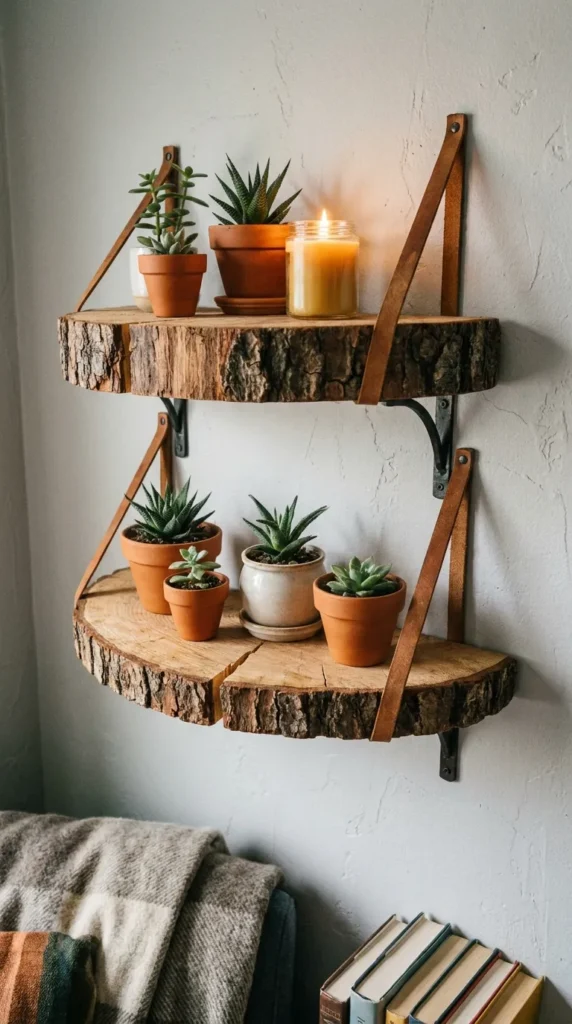
10. Floating Wood Slice Wall Shelves
What This Idea Means
Natural wood slice shelves attach flush against the wall, creating an organic, rustic display spot for small succulents, candles, or tiny treasures.
Supplies Needed
- Kiln-dried natural wood tree slices (1–2 inches thick)
- Saw (to cut slice in half)
- Heavy-duty L-brackets or hidden shelf hardware
- Wood stain or polyurethane clear coat
- Screws and drywall anchors
How to Make It
- Cut Slice: Cut the round wood slice in half along the diameter to create two semi-circle shelves with a flat rear edge.
- Sand & Finish: Sand the surface smooth, apply wood stain if desired, and seal with polyurethane.
- Attach Brackets: Secure small metal L-brackets onto the flat back edge of the wood slice.
- Mount: Level the shelf on your wall, insert drywall anchors, and drive screws through brackets into the wall.
Tips & Variations
- Tip: Keep the natural live bark along the curved front edge intact for a cozy rustic look.
- Variation: Spray paint metal brackets in brushed metallic brass or matte gold to add refined sparkle.

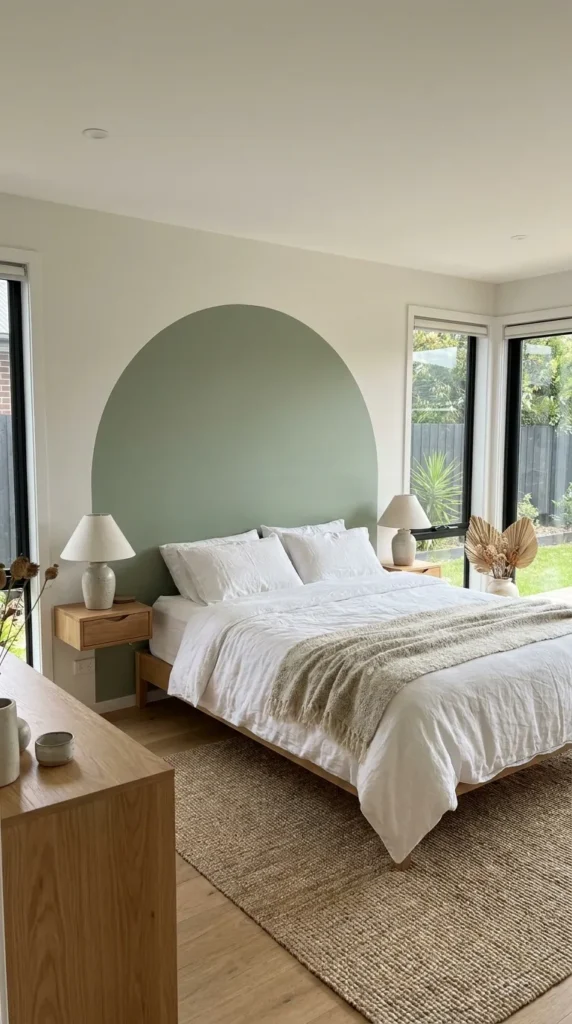
11. Custom Painted Arch Nook Headboard
What This Idea Means
If buying a high-end headboard isn’t in your budget, creating a faux headboard directly on your wall using paint instantly anchors your bed and creates a stunning, custom bedroom statement.
Supplies Needed
- Interior accent paint color
- Painter’s tape
- Pencil, string, and tape measure
- Paint roller and brush set
How to Make It
- Center Bed Position: Measure your bed frame width and mark a area slightly wider on the wall.
- Draw Geometric Shape: Create a wide arch, rectangle, or half-moon silhouette behind where your bed sits.
- Tape Borders: Tape off straight lines cleanly.
- Paint: Roll two coats of paint into the taped area, letting dry between coats.
- Style Bed: Push your bed frame flush against the wall once the paint cures completely.
Tips & Variations
- Tip: Pick a rich color contrast like warm terracotta, sage green, or deep navy against light walls.
- Variation: Paint a double arch with two tonal shades (one dark, one light) nested inside each other.
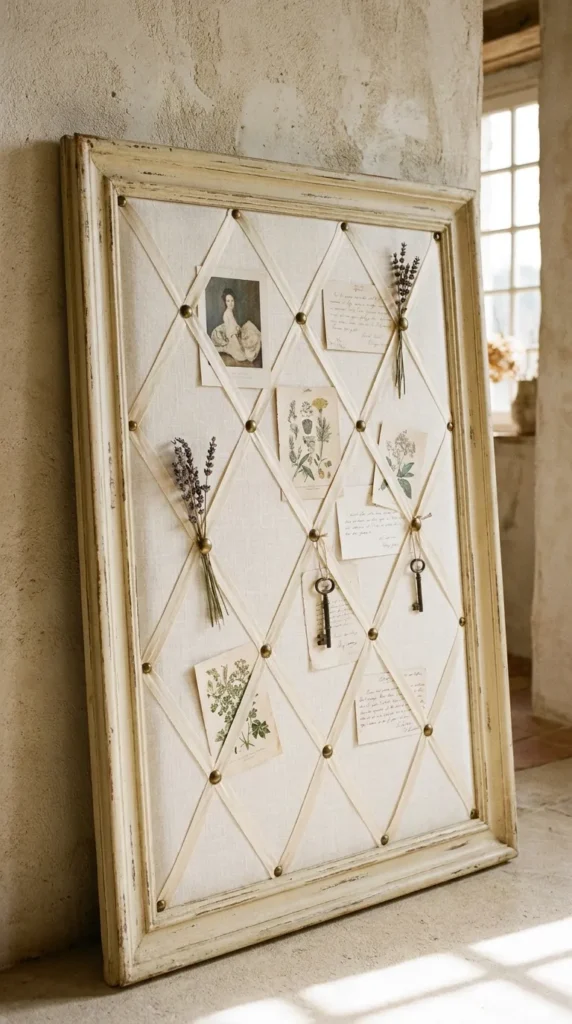
12. Fabric-Covered Bulletin & Mood Boards
What This Idea Means
Ditch unsightly cork bulletin boards in favor of linen-covered, French-tufted memo boards that look gorgeous in home offices, kitchens, or entryway nooks.
Supplies Needed
- Basic framed corkboard or thick foam insulation board
- Neutral linen or cotton upholstery fabric
- Batting layer (optional for softness)
- Heavy-duty staple gun
- Ribbon and upholstery tacks
How to Make It
- Wrap Layer: Place fabric face down, add a thin layer of batting, and center your board on top.
- Staple Tightly: Pull fabric taut over the back edges and staple tightly all the way around, folding corners neatly like a present.
- Criss-Cross Ribbon: Lay ribbon across the board in a diagonal diamond lattice pattern.
- Secure Points: Push upholstery tacks into every ribbon intersection to hold notes and photos gracefully.
Tips & Variations
- Tip: Use oatmeal or natural flax linen fabric to achieve a high-end French country vibe.
- Variation: Omit the ribbons and keep the fabric stretched plain for a ultra-clean Scandinavian aesthetic.
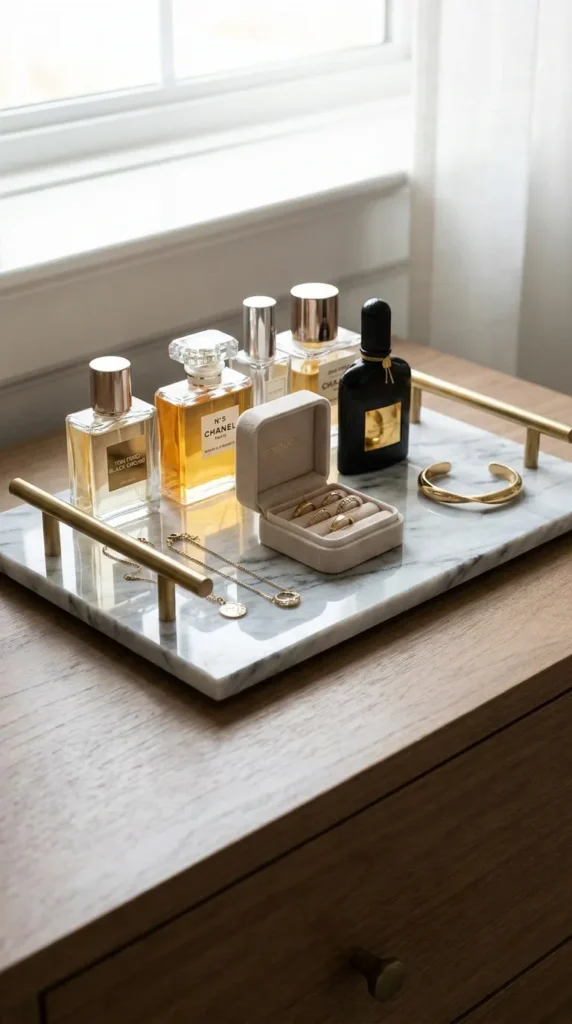
13. DIY Faux Marble Paper Tray
What This Idea Means
Turn a plain wooden tray or cardboard box lid into a sleek marble vanity tray using marble-patterned contact paper. It’s an ultra-fast project perfect for organizing perfume bottles, keys, or coffee table decor.
Supplies Needed
- Plain wooden serving tray or sturdy flat rim tray
- Self-adhesive marble contact paper
- Scissors and utility knife
- Squeegee or credit card (to smooth bubbles)
- Gold metallic spray paint
How to Make It
- Paint Tray Edges: Spray paint the rim and handles of the wooden tray in bright metallic gold or warm brass; let dry.
- Measure Paper: Measure the bottom inner base of the tray and cut contact paper with a 0.5-inch border extra.
- Peel & Stick: Peel back 2 inches of backing paper, align along top inner edge, and smooth downward with a squeegee to prevent air bubbles.
- Trim Edges: Trim excess contact paper carefully along tray borders using a sharp utility knife blade.
Tips & Variations
- Tip: Prick any stubborn air bubbles with a tiny sewing pin and smooth down flat.
- Variation: Use matte black marble paper combined with black satin handles for a dark moody aesthetic.
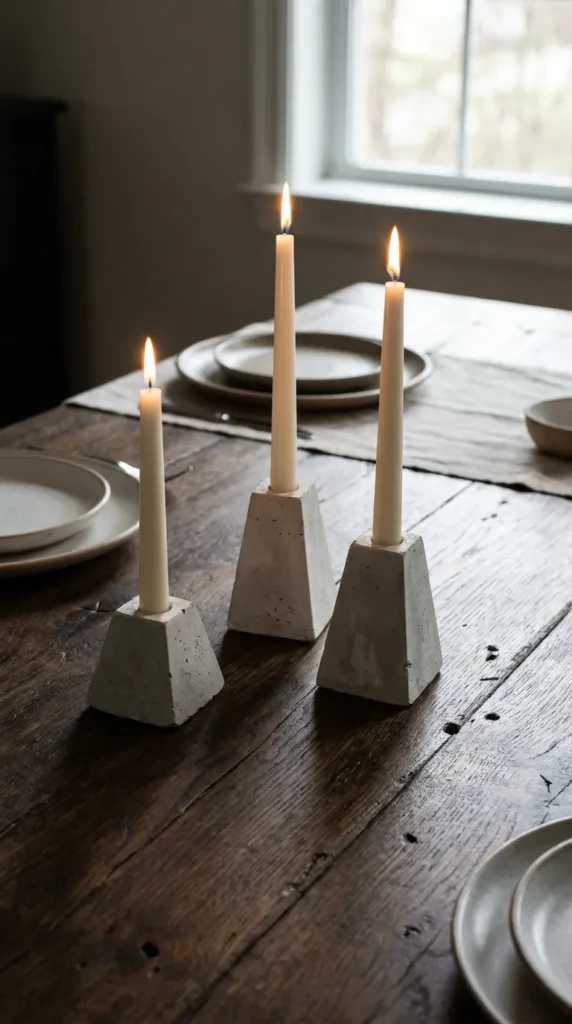
14. Cement Geometric Candle Holders
What This Idea Means
Raw concrete and industrial cement accents add striking structure and modern contrast to soft home decor. Craft custom geometric candle holders using empty milk cartons or recycled plastic containers.
Supplies Needed
- Quick-set concrete mix or cement powder
- Water and disposable mixing bucket
- Plastic molds (cut milk cartons, yogurt cups, or silicone molds)
- Taper candles (to push into wet cement)
- Vegetable oil or cooking spray
- Fine sandpaper
How to Make It
- Prep Mold: Lightly spray the inner lining of your plastic mold with cooking spray for easy release.
- Mix Cement: Combine quick-set concrete mix with water according to package directions until it reaches a smooth pancake batter consistency.
- Pour Cement: Fill plastic mold to desired height. Tap sides firmly to release trapped air bubbles.
- Insert Candle: Spray the base of a taper candle with oil and push gently into center wet concrete, holding in place for a few minutes until firm.
- Unmold & Sand: Allow to set for 24 hours. Remove mold and sand bottom flat.
Tips & Variations
- Tip: Remove candle before cement sets 100% hard so you don’t crack the mold when changing candles.
- Variation: Dip the bottom half of dried gray concrete candle holders into metallic copper paint.
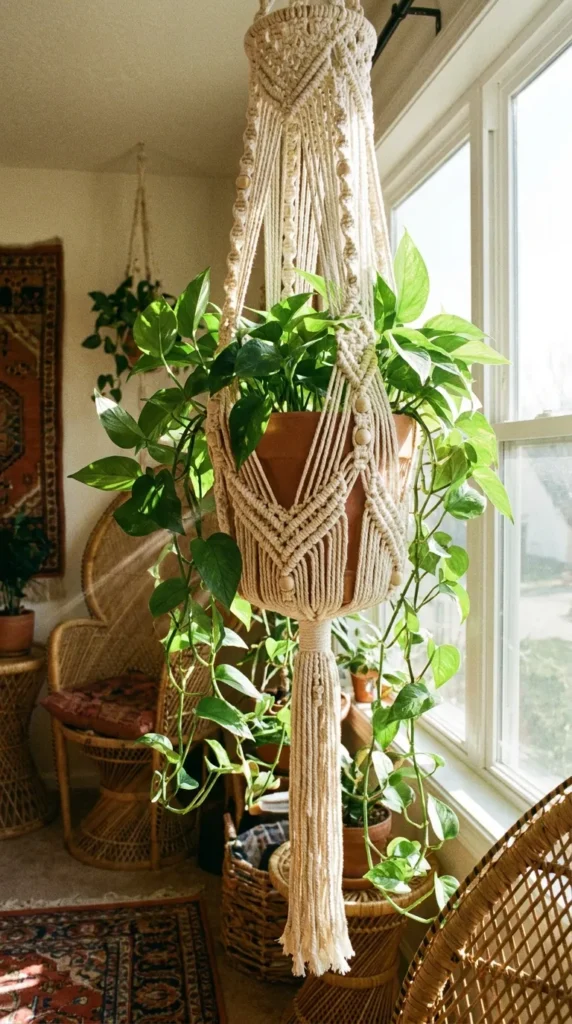
15. Macrame Plant Hanger
What This Idea Means
Macrame plant hangers lift indoor greenery off flat surfaces, adding lush vertical interest, bohemian texture, and beautiful greenery to window frames and bare corners.
Supplies Needed
- 4mm cotton macrame cord
- Wooden mounting ring
- Scissors
- Potted indoor plant
How to Make It
- Cut Cords: Cut 8 strands of macrame cord, each about 8 feet long.
- Attach to Ring: Fold strands in half, pass loops through wooden ring, and pull ends through to create a strong mounting knot.
- Knot Pairs: Divide cords into 4 groups of 4 cords each. Tie simple square knots down each cord strand group.
- Form Basket: Alternate cords from adjacent groups and knot together roughly 3 inches lower down to weave a supportive net basket.
- Gather Bottom: Gather all cords together below your basket grid and tie one large tight gathering knot. Trim bottom cords to form a decorative fringe tail.
Tips & Variations
- Tip: Hang the ring on a door knob or wall hook while knotting to keep tension even.
- Variation: Thread large wooden beads onto cords between knots for added design flair.


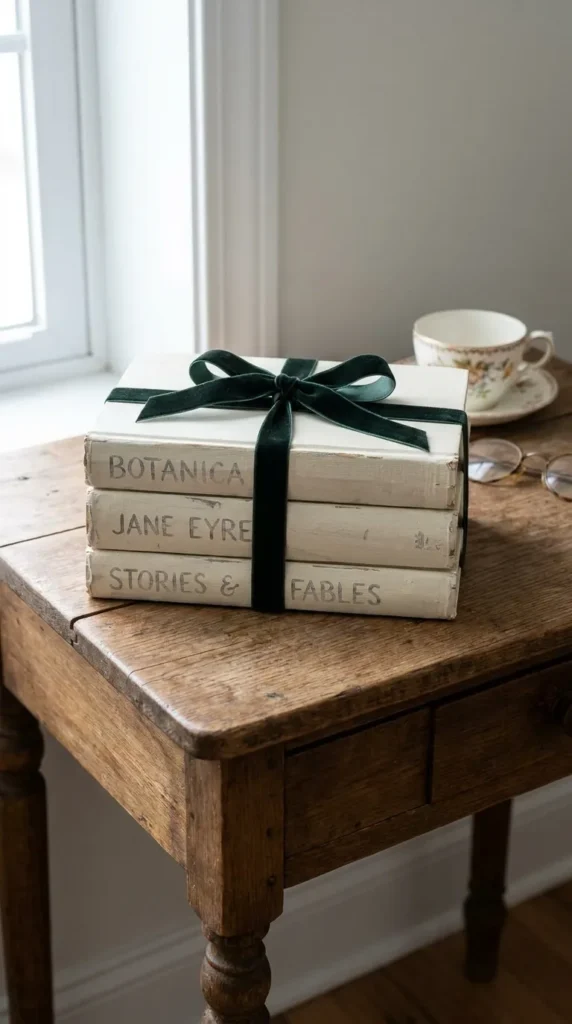
16. Upcycled Book Stack Decor
What This Idea Means
Hardcover book stacks capped with simple decor accessories are classic coffee table and bookshelf styling tools. Neutralized book stacks keep busy cover designs from distracting from your room color scheme.
Supplies Needed
- Old unwanted hardcover books (thrifted or unused)
- Off-white or black chalk paint (or white butcher paper)
- Paintbrush
- Jute twine or velvet ribbon
- Decorative stamp set and ink pad
How to Make It
- Remove Covers: Remove colorful paper dust jackets.
- Paint Covers: Paint spine and outer hardcovers with 2 coats of matte chalk paint (leave pages unpainted).
- Stamp Words: Once dry, use letter stamps on the book spines to spell out inspiring words or favorite family names.
- Tie Bundle: Stack 3 books from largest to smallest and tie tightly together with jute twine or velvet ribbon.
Tips & Variations
- Tip: Lightly distress painted edges with sandpaper to reveal underlying dark boards for vintage charm.
- Variation: Tear off hardcovers completely and leave raw exposed paper book bindings bound together with ribbon.
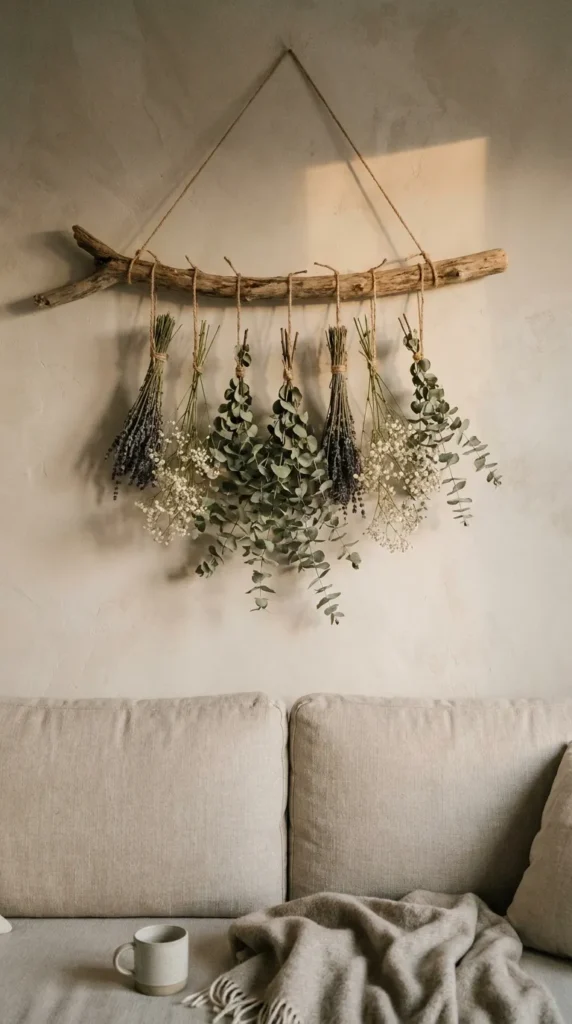
17. Dried Floral Wall Hanging
What This Idea Means
Drying wildflowers and suspended branches turns nature into delicate art. Dried floral wall hangings serve as a dreamy alternative to framed wall prints over headboards or dining buffets.
Supplies Needed
- Fallen natural tree branch (2 to 3 feet long)
- Assorted dried flowers (e.g., baby’s breath, dried eucalyptus, bunny tails, lavender)
- Clear fishing line or embroidery thread
- Scissors
How to Make It
- Prep Branch: Clean branch off, sand away rough spots, and coat with clear varnish if desired.
- Bundle Flowers: Gather dried flowers into small mixed mini-posies and bind stems with thread.
- Attach Lines: Tie lengths of clear thread to each floral mini-posy.
- Suspend from Branch: Tie threads along the branch at varying staggered lengths so flowers cascade down gracefully.
- Hang: Attach a main hanging cord to both outer ends of the branch and mount on wall hook.
Tips & Variations
- Tip: Stagger stem lengths in an inverted V-shape or asymmetric curve for dynamic natural balance.
- Variation: Use dried orange slices and cinnamon sticks mixed with greenery for a warm seasonal display.
18. Faux Terracotta Footed Planters
What This Idea Means
Turn cheap plastic nursery pots into heavy, high-end faux terracotta planters using a combination of texture paint techniques and attached wooden wooden feet.
Supplies Needed
- Plastic plant pots
- Terracotta color acrylic paint mixed with baking powder
- Small round wooden doll heads or furniture legs
- Gorilla glue or hot glue
- Paintbrush
How to Make It
- Attach Feet: Flip plastic pot upside down and glue 3 or 4 small round wooden doll heads evenly spaced onto the bottom base to create feet.
- Mix Textured Paint: Combine terracotta paint with 2 tablespoons of baking powder until it bubbles and turns thick.
- Paint Pot: Brush coat of mixture over plastic pot and wooden feet, using dabbing motions.
- Second Coat: Apply a second layer to completely cover smooth plastic sheen with earthy, porous texture.
Tips & Variations
- Tip: Lightly dust wet second coat with actual flour or white powder and smudge for an aged vintage patina.
- Variation: Apply dark gray or black paint to recreate modern concrete or volcanic stone planters.
19. DIY Ribbed Glass Lanterns
What This Idea Means
Fluted and ribbed glass diffuses candlelight into gorgeous, romantic patterns. Recreate expensive ribbed fluted hurricane candle holders using basic cylinder vases and thin wooden dowels or glass-safe glue strips.
Supplies Needed
- Straight cylinder glass vases
- Half-round wooden molding strips or thin bamboo skewers
- Strong clear adhesive (like E6000 or hot glue)
- Utility knife
- Metallic or neutral spray paint
How to Make It
- Measure Strips: Measure outer height of glass vase and cut wooden dowel strips to exact height.
- Glue Strips: Apply a fine bead of glue down vertical length of a strip and press flush against glass vase edge.
- Repeat Around Vessel: Continue gluing strips side-by-side continuously around entire circumference of vase.
- Spray Paint: Once glue sets, spray entire exterior in satin ivory, sage green, or matte black.
- Insert Candle: Place an LED pillar candle inside.
Tips & Variations
- Tip: Use an LED flameless candle to avoid heat melting the adhesive on wooden strips over time.
- Variation: Leave wooden strips unpainted and seal with clear varnish for warm mid-century modern look.
20. Fabric Lumbar Pillow Cover
What This Idea Means
Custom decorative accent pillows can be expensive, but sewing a simple envelope-back pillow cover using remnant fabric lets you easily swap pillow covers every season at a fraction of retail cost.
Supplies Needed
- 1/2 yard of linen, velvet, or canvas fabric
- Pillow insert (e.g., 12×20 inch lumbar insert)
- Sewing machine or fabric glue (for no-sew option)
- Iron and fabric scissors
How to Make It
- Cut Fabric: Cut one front piece equal to pillow size + 1 inch seam allowance. Cut two back pieces that overlap each other by 4 inches.
- Hem Edges: Hem inner overlapping edges of the two back pieces.
- Pin Right Sides: Lay front piece face up, place back overlapping pieces face down on top, and pin borders aligned.
- Sew Border: Sew 1/2-inch seam around all 4 outer sides of square/rectangle.
- Turn & Stuff: Turn pillowcase inside out through overlapping envelope opening, press corners sharp with iron, and slide pillow insert inside.
Tips & Variations
- Tip: Press all seams flat with an iron before sewing to keep lines sharp and straight.
- Variation: Stitch decorative tassels onto the four corners of the pillow cover before sewing seams closed.