1. Ghostly Mason Jar Lanterns
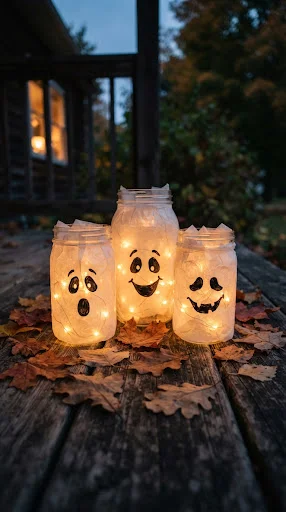
Transform ordinary, dusty mason jars into a hauntingly beautiful glowing pathway with this simple yet mesmerizing craft. Perfect for lining your front porch steps or adding a flickering, eerie ambiance to your living room mantle, these ghostly lanterns capture the whimsical spirit of Halloween. By using basic crafting supplies like acrylic paint, matte decoupage glue, and tissue paper, you can create a frosted, ethereal look that beautifully diffuses light. The key to making these stand out is the expression on each ghostly face; you can paint on classic, spooky grins, surprised wails, or even sweet, friendly smiles that are perfect for younger children.
To begin, thoroughly clean your glass jars to remove any oils or residue. Apply a thin, even layer of white tissue paper using a sponge brush and decoupage medium, wrapping it smoothly around the exterior. Once dry, use a fine-tip black paint pen or black acrylic paint to sketch your unique ghost faces directly onto the textured surface. For the ultimate magical glow, drop a battery-operated LED tealight or a string of warm fairy lights inside. The soft, diffused light will make the white tissue paper shimmer, casting gentle shadows and bringing your handmade spectral crew to life when the sun goes down.
2. Velvet Pumpkin Patch
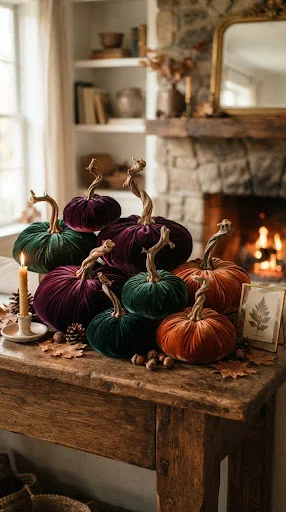
If your Halloween aesthetic leans more toward sophisticated elegance than spooky frights, crafting a collection of plush velvet pumpkins is the perfect autumn project. These luxurious, tactile decorations look incredibly high-end, mimicking the gorgeous designer pumpkins found in boutique home decor stores for a fraction of the cost. Using rich, jewel-toned velvet fabrics like deep amethyst, emerald green, burnt orange, and midnight black, you can create a stunning centerpiece for your dining table or a cozy accent arrangement for your fireplace hearth.
The construction is surprisingly simple and requires only basic hand-sewing skills. Cut a circle of velvet fabric, sew a simple running stitch around the edge, and stuff the center with fluffy polyester fiberfill and a handful of dried beans or rice for weight. Pull the thread tight to gather the fabric into a plump ball, secure it, and then use heavy embroidery floss to wrap around the pumpkin, creating realistic, indented segments. Finish the look by hot-gluing a real, dried pumpkin stem—salvaged from last year’s jack-o’-lanterns or collected from a local patch—to the top. The contrast between the soft, shimmering velvet and the rustic, textured stem is pure design magic.
3. Gothic Dried Flower Wreath

Welcome your October guests with a stunning, dark-romantic statement piece hanging on your front door. A gothic dried flower wreath combines the natural beauty of autumn harvest elements with a moody, Victorian-inspired color palette. By blending deep burgundy roses, dried eucalyptus, dark purple hydrangeas, and spray-painted black seed pods, you create a botanical display that feels both elegant and beautifully decaying. This craft is a wonderful way to repurpose dried flowers and celebrate the transition of seasons with a dramatic, artistic flair.
Start with a natural grapevine wreath base, which provides the perfect rustic, organic texture. Use black spray paint to lightly dust the grapevine if you want an extra layer of shadow and depth. Carefully arrange your dried florals, focusing the heaviest concentration on one side of the wreath to create a modern, asymmetrical crescent shape. Secure the stems with floral wire and hot glue, layering the darkest elements at the back and popping lighter, dusty-rose or cream-colored accents in the foreground for contrast. Finish this gorgeous piece with a long, trailing ribbon of black silk or frayed chiffon that flutters gently in the autumn breeze.
4. Floating Witch Hats
Turn your porch or hallway into a scene straight out of a magical school of witchcraft and wizardry. Floating witch hats are a classic, high-impact Halloween decoration that never fails to delight trick-or-treaters and party guests alike. By suspending simple, inexpensive black witch hats from the ceiling at varying heights, you create a whimsical optical illusion that looks as though a coven of witches has just vanished into thin air, leaving their enchanted headwear floating behind.
To achieve this spellbinding effect, you will need a pack of cheap nylon witch hats, clear monofilament fishing line, a long needle, and outdoor-safe battery-operated LED glow sticks or fairy lights. Thread the fishing line through the pointed tip of each hat, securing it with a knot or a small bead on the inside so it doesn’t slip through. Before hanging them, insert a lightweight, remote-controlled LED light inside the crown of each hat. Hang them from your porch ceiling, tree branches, or indoor rafters. When night falls, use the remote control to turn on the lights, and watch your ceiling glow with an enchanting, floating warmth.
5. Haunted Mirror Portrait
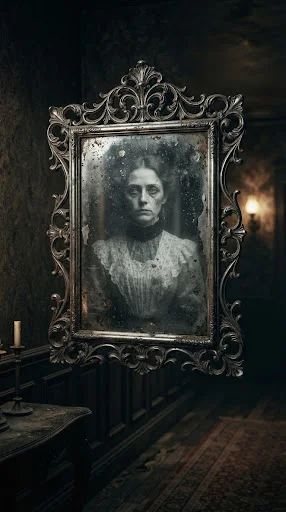
Give your home the look of an abandoned, ancestral manor with a haunted mirror portrait that reveals a spooky, spectral image when viewed from the right angle. This craft uses a clever layering technique with a cheap thrift store mirror or a plastic frame to create a spooky, holographic-style illusion. It is an incredibly fun way to add a subtle, chilling detail to your hallway or bathroom, catching your guests off guard when they look in the mirror to check their costumes.
To create this eerie piece, find a vintage-style ornate frame with glass. Remove the glass and spray the back of it with a light, uneven coat of looking glass spray paint, which creates a reflective, slightly translucent mirror finish. Before the paint dries, gently spritz it with a mixture of water and vinegar, then dab it with a paper towel to create an aged, distressed, and peeling effect. Print out a vintage, black-and-white portrait of a Victorian figure or a ghostly silhouette, and place it directly behind the distressed glass. The image will peer through the worn, silvered spots of the mirror, looking like a spirit trapped between worlds.
6. Apothecary Spell Bottles
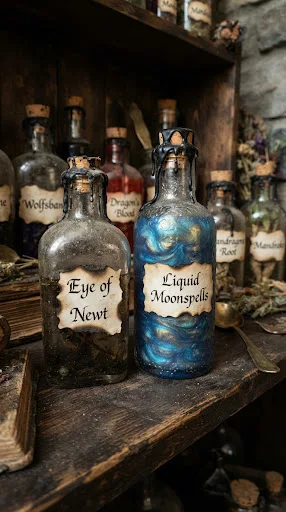
Unleash your inner alchemist by crafting a collection of dusty, mysterious apothecary spell bottles. Filled with bizarre ingredients like “Eye of Newt,” “Dragon’s Breath,” or “Liquid Moonspells,” these bottles look fantastic grouped together on a bookshelf, kitchen counter, or bar cart. This is a highly creative, budget-friendly craft that allows you to upcycle old wine bottles, condiment jars, and perfume containers into highly detailed, vintage-looking props.
First, collect glass bottles of various shapes and sizes. To give them an ancient, dusty appearance, coat them with a mixture of matte mod podge and a tiny sprinkle of dark grey chalk paint or real dirt. Design and print out vintage-style labels with aged, yellowed paper, or write them by hand using calligraphy on tea-stained paper. Burn the edges of the labels with a lighter for a charred, authentic look before gluing them to the bottles. Fill the containers with colored water, glitter, dried moss, or plastic creepy-crawlies, and seal the tops with real corks. For a final touch of dark magic, melt black or burgundy sealing wax over the corks and down the necks of the bottles.
7. Pressed Leaf Skeletons
Celebrate the natural beauty of autumn decay by creating delicate, intricate pressed leaf skeletons. This craft takes the gorgeous, fallen leaves of October and strips them down to their delicate, lace-like vein structures. Once preserved and dyed, these leaf skeletons can be framed between double-sided glass, used to decorate handmade cards, or hung as delicate, translucent ornaments that catch the amber autumn sunlight. It is a slow, meditative craft that yields incredibly elegant, scientific-looking results.
To make leaf skeletons, you will need sturdy, mature leaves (such as oak, maple, or magnolia), washing soda (sodium carbonate), and water. Simmer the leaves in a mixture of water and washing soda for about 30 to 40 minutes, which softens the green tissue of the leaf without damaging the fibrous veins. Carefully remove the leaves and place them in a shallow dish of cold water. Using a soft-bristled toothbrush, very gently brush away the softened green pulp, revealing the gorgeous, intricate skeleton beneath. Once clean, pat them dry, press them flat in a heavy book, and paint or dye them in rich shades of copper, gold, or charcoal black.
8. Whimsical Paper Mache Pumpkins
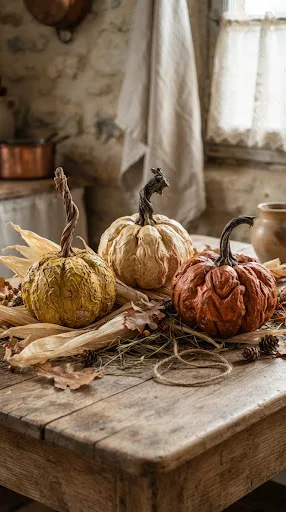
Step away from the plastic store-bought pumpkins and embrace the rustic, artistic charm of handmade paper mache pumpkins. This classic crafting technique allows you to sculpt completely unique, character-filled gourds with expressive faces, elongated stems, and whimsical, asymmetrical shapes. Because they are handmade from scratch, no two will ever be alike, giving your Halloween display a playful, folk-art quality that feels incredibly warm and inviting.
Start by creating a base structure using a balloon wrapped in vertical loops of kitchen twine to create those classic pumpkin ridges. Cover this structure with several layers of newspaper strips dipped in a simple paste of flour, water, and a pinch of salt. Once the paper mache is completely dry and rock-hard, pop the balloon inside. Now comes the fun part: sculpting! Use paper clay to build up a rustic, twisted stem and to add expressive eyes or a toothy grin. Paint your finished pumpkin with layers of acrylic paint, starting with a dark brown base coat in the crevices and layering orange, mustard, and cream on top to create a rich, weathered depth.
9. Celestial Beaded Spiders
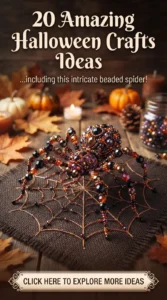
Forget about the cheap, fuzzy plastic spiders and create something truly enchanting and beautiful with celestial beaded spiders. These delicate, glittering arachnids are made using wire, metallic beads, and shimmering crystals, transforming a traditionally creepy creature into a stunning piece of jewelry-like home decor. They look absolutely magical catching the light when hung in windows, perched on the branches of a Halloween tree, or used as elegant napkin rings for a dinner party.
To craft these dazzling spiders, you will need jewelry wire, needle-nosed pliers, and a variety of beads in celestial colors like midnight blue, silver, iridescent white, and metallic black. Choose a large, faceted crystal bead for the abdomen and a slightly smaller, round bead for the head. Thread them onto a central wire to form the body. Next, cut four equal lengths of wire to create the legs. Thread colorful, tapered bugle beads and small seed beads onto the wires, bending them carefully to mimic the jointed, delicate legs of a spider. Wrap the leg wires securely around the center of the body, and shape them so your glittering spider can stand proudly on its own.
10. Spooky Floating Candles

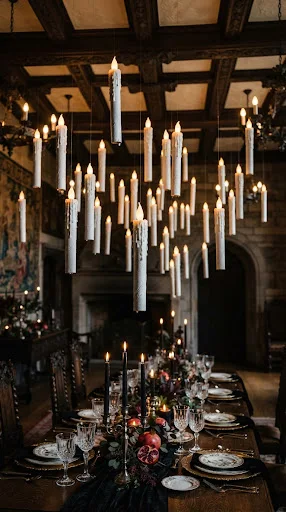
Bring the magic of an enchanted, floating dining hall into your own home with these incredible spooky floating candles. Suspended from the ceiling by invisible thread, these candles appear to hover in mid-air, flickering gently as if held by unseen spirits. This is a show-stopping decoration for an entryway or dining room, creating an instant sense of wonder and theatrical drama that your guests will talk about long after Halloween is over.
You can easily craft these using empty cardboard paper towel or toilet paper rolls. Cut the tubes to various lengths, and paint them a clean, matte white. To create the illusion of melting wax, run hot glue around the top rim of the tube, letting it drip down the sides in thick, uneven streams, and paint the dry glue white as well. Insert a battery-operated LED tea light into the top of each tube, securing it so the flame sits just above the rim. Thread a needle with clear nylon fishing line through the top of the cardboard tube, tie it securely, and hang them from your ceiling using small adhesive hooks. Use a remote control to turn them all on at once for a breathtaking, magical moment.
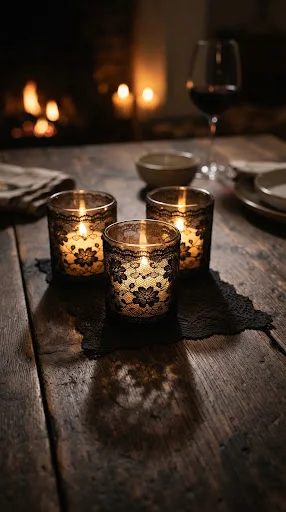
11. Black Lace Votive Holders

Add a touch of sultry, Victorian gothic romance to your Halloween tablescape with black lace votive holders. This incredibly quick and budget-friendly craft transforms simple glass candle holders into elegant, shadow-casting beauties. When the candles are lit, the intricate patterns of the black lace project gorgeous, delicate shadows across your walls and table, creating a cozy, moody, and slightly mysterious atmosphere.
To make these, gather plain glass cylinder votive holders or upcycled glass jars. Measure the circumference of each jar and cut a piece of black lace trim to fit perfectly around it, leaving a tiny overlap. Apply a thin layer of clear-drying fabric glue or mod podge to the back of the lace, and wrap it tightly around the glass, smoothing out any bubbles. You can use lace with classic floral patterns, or search for lace that features spiderweb-like designs for an extra Halloween touch. Tie a thin piece of black velvet ribbon or twine around the rim of the glass to finish the look, and drop in a scented tealight candle.
12. Skeleton Key Wind Chime

Create a hauntingly beautiful, melodic soundtrack for your autumn porch with a skeleton key wind chime. This craft combines the rustic charm of weathered wood with the enchanting, metallic clink of vintage-style skeleton keys. As the cool autumn wind blows, the keys sway and tap against one another, producing a delicate, musical sound that feels mysterious, nostalgic, and perfectly suited for chilly October nights.
To begin, find a sturdy, weathered branch or a piece of interesting driftwood during a nature walk. You can leave it natural or paint it a distressed matte black. Collect a dozen or more vintage skeleton keys—you can find real ones at antique shops or purchase highly detailed replica packs online. Tie varying lengths of black hemp cord or clear fishing line to each key, and tie the other ends to your branch, spacing them closely enough so they will easily strike each other in a light breeze. Add a few dark glass beads or small silver bells between the keys for extra sparkle and sound, and hang the chime in a drafty doorway or on your front porch.
13. Enchanted Mushroom Terrarium
Capture the magical, mysterious essence of a deep forest floor in autumn with an enchanted mushroom terrarium. This miniature world features glowing, fantastical mushrooms, rich green moss, tiny twigs, and perhaps a hidden skull or a tiny fairy skeleton. It is a beautiful, imaginative craft that looks like a living slice of a dark fairytale, perfect for displaying on a side table or desk throughout the autumn season.
Use a clean, lidded glass jar, cloche, or lantern as your vessel. Layer the bottom with small pebbles for drainage, followed by a layer of charcoal and rich potting soil. Arrange preserved green moss, dried twigs, and small pebbles to look like a miniature forest landscape. To make the mushrooms, sculpt tiny caps and stems out of translucent polymer clay, inserting a tiny wire into the base of each so they can stand in the soil. For an extra touch of magic, paint the mushroom caps with glow-in-the-dark acrylic paint, or thread tiny, micro-LED fairy lights up through the stems so your enchanted forest glows softly when the lights go out.
14. Creepy-Crawly Specimen Frames

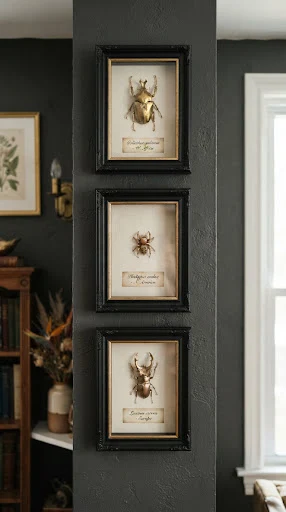
Embrace the aesthetic of a Victorian naturalist’s study with creepy-crawly specimen frames. This sophisticated craft takes plastic toy insects, spiders, or bats and elevates them into high-end, museum-quality display pieces. By painting the creatures in metallic gold or matte black and mounting them inside deep shadowbox frames with elegant linen backgrounds and scientific labels, you create a display that is both fascinating and beautifully artistic.
Purchase a pack of cheap, plastic bugs or bats from a dollar store. Spray paint them with a high-quality metallic gold, copper, or matte black paint, which instantly hides the cheap plastic texture and highlights the intricate details of their wings and legs. Cut pieces of textured linen fabric or vintage book pages to fit the backing of your shadowbox frames. Mount your painted specimens in the center using a small dab of hot glue or a jewelry pin. Below each creature, glue a small, aged paper label with its “scientific” name written in elegant cursive. Group three or four of these frames together on a wall for a stunning, academic-looking Halloween gallery.
15. Velvet Bat Branch Mobile
Bring a sense of movement and whimsical flight to your Halloween decor with a velvet bat branch mobile. This beautiful, minimalist craft features delicate, dark bats cut from rich velvet paper or fabric, suspended from a rustic, gnarled tree branch. As the air in your home moves, the bats gently sway, spin, and flutter, creating a dynamic, artistic installation that looks incredibly stylish hanging in a window, over a dining table, or in a cozy corner.
Find a beautiful, multi-branched twig or branch from your yard and paint it a sleek matte black or leave it natural for a rustic look. Using a template, cut out several bat silhouettes of various sizes from black velvet cardstock or stiffened velvet fabric, which gives them a gorgeous, light-absorbing texture. Attach a length of black thread or clear monofilament to the center of each bat so they hang horizontally. Tie the threads to the branch at different heights, balancing the weight so the branch hangs level when suspended from the ceiling. The result is a sophisticated, poetic display of nature’s most misunderstood Halloween creatures.
16. Decoupage Pumpkin Art

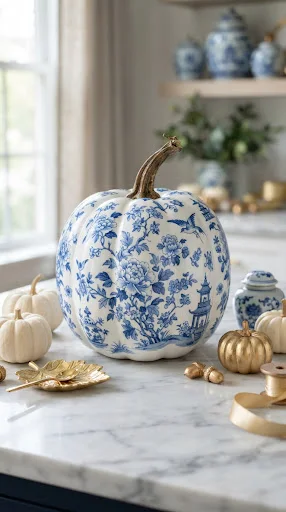
If you want to skip the messy pumpkin carving this year, decoupage pumpkin art is the ultimate creative alternative. This technique allows you to decorate real or artificial pumpkins with intricate, beautiful patterns using paper napkins, dried botanicals, or printed paper designs. From elegant blue-and-white chinoiserie patterns to dark, moody botanical illustrations, the design possibilities are completely endless, resulting in stunning, paint-like finishes that last all season long.
Start with a smooth, clean pumpkin—white pumpkins work best as they allow the colors of your paper designs to pop. Cut out your chosen patterns from thin paper napkins, keeping only the top, printed layer. Apply a layer of matte decoupage medium (like Mod Podge) directly to the pumpkin’s surface, gently press the paper design onto the wet glue, and smooth out any wrinkles with a soft brush or your fingers. Work in small sections, wrapping the designs around the natural curves of the pumpkin. Once the entire pumpkin is decorated and dry, seal it with a final coat of matte or glossy sealer to protect your gorgeous, handmade masterpiece.
17. Spooky Book Stack

Transform ordinary, discarded hardcover books into a stack of ancient, leather-bound spell books that look like they belong in a wizard’s private library. This craft is a book-lover’s dream, allowing you to use 3D textures, metallic paints, and creative aging techniques to turn cheap thrift store finds into highly detailed, magical props. Stacked on a coffee table or used as bookends, they add a wonderful sense of history, mystery, and cozy academia to your Halloween decor.
Find three or four old hardcover books of varying sizes. To create 3D details on the spines and covers, use hot glue to draw raised lines, spiderwebs, or mysterious runes. You can also glue on plastic spiders, small plastic skulls, or metal filigree corners. Once the glue is dry, cover the entire book cover with a layer of tissue paper dipped in glue, pressing it into the crevices to create a wrinkled, leather-like texture. Paint the books with dark acrylics like deep navy, forest green, or burgundy, and then gently buff metallic gold or bronze wax over the raised hot-glue details to make them shine like antique metal.
18. Vintage Ghost Painting

Join the viral, incredibly fun “thrifted ghost painting” trend by adding your own whimsical, spooky characters to a pre-existing landscape print. This craft is not only highly creative but also a wonderful way to give new, humorous life to forgotten, old paintings found at thrift stores or garage sales. By painting sweet, simple ghosts into serene forest scenes, quiet cabin landscapes, or formal portraits, you create a unique piece of art that is both nostalgic and delightfully playful.
Visit a local thrift shop and find a framed landscape painting or print—oil or textured prints work best. Using white acrylic paint, carefully sketch the simple, rounded silhouette of a ghost directly onto the canvas, placing them as if they are actually walking down the path, peering out from behind a tree, or enjoying a picnic in the meadow. Add shadows beneath the ghost using a watered-down black or blue paint to make them blend seamlessly into the original painting’s lighting. Finish by painting on two simple black dots for eyes. Pop the painting back into its vintage frame, and display your custom, spooky art with pride.
19. Macrame Witch Broom

Add a beautiful, bohemian-chic touch to your Halloween decorations with a handmade macrame witch broom. This craft combines the natural, textured art of knotting cord with the rustic charm of a woodland walking stick. Hung on a wall or propped up in a corner, this decorative broom feels warm, earthy, and beautifully crafted, offering a lovely alternative to traditional, plastic Halloween decorations.
To create your broom, find a thick, sturdy branch with a beautiful bark texture or a smooth, weathered piece of driftwood to serve as the broomstick handle. Cut several long lengths of natural cotton macrame cord in your choice of colors—classic cream, mustard yellow, burnt orange, or charcoal grey work beautifully. Using a series of lark’s head knots, attach the cords securely to the bottom of your stick, creating a thick, full skirt of fringe. You can leave the cords hanging straight and brush them out for a soft, fluffy look, or knot them into beautiful, intricate diamond patterns before letting the fringe flow free. Embellish the handle with wrapped copper wire, dried lavender, or a small crystal pendant.
20. Gothic Candelabra

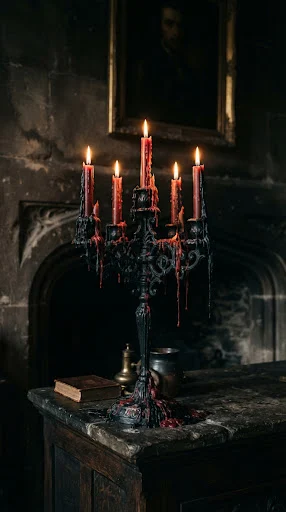
No spooky dinner party or haunted mantelpiece is complete without the dramatic, flickering glow of a gothic candelabra. This craft allows you to take a simple, cheap metal or plastic candelabra and transform it into an antique, wax-dripped masterpiece that looks like it was salvaged from a ruined castle. The key to this look is the layering of rich textures, dark colors, and the beautiful, dramatic buildup of colorful, dripping candle wax.
Purchase a multi-arm candelabra from a thrift store or party supply shop. If it is plastic or bright metal, spray paint it with a textured matte black or deep charcoal paint to give it a heavy, cast-iron appearance. Once dry, lightly brush metallic silver or gold paint onto the edges to create a weathered, antique patina. Insert tall, tapered candles in deep, dramatic colors like blood red, plum, or charcoal black. Light the candles and let them burn in a draft-free area, allowing the wax to drip naturally down the arms of the candelabra, creating a gorgeous, cascading buildup of wax. For safety, you can also use battery-operated tapers and create the drips using a hot glue gun before painting.