Transforming a small or overlooked outdoor space into a stylish retreat does not require a massive renovation budget. With a thoughtful combination of creative DIY solutions, intentional layout choices, space-saving furniture, and warm ambient lighting, any balcony can be converted into an inviting extension of your living area.
Below are 20 actionable, modern, and budget-friendly makeover ideas designed to maximize style and function in even the smallest outdoor footprint.

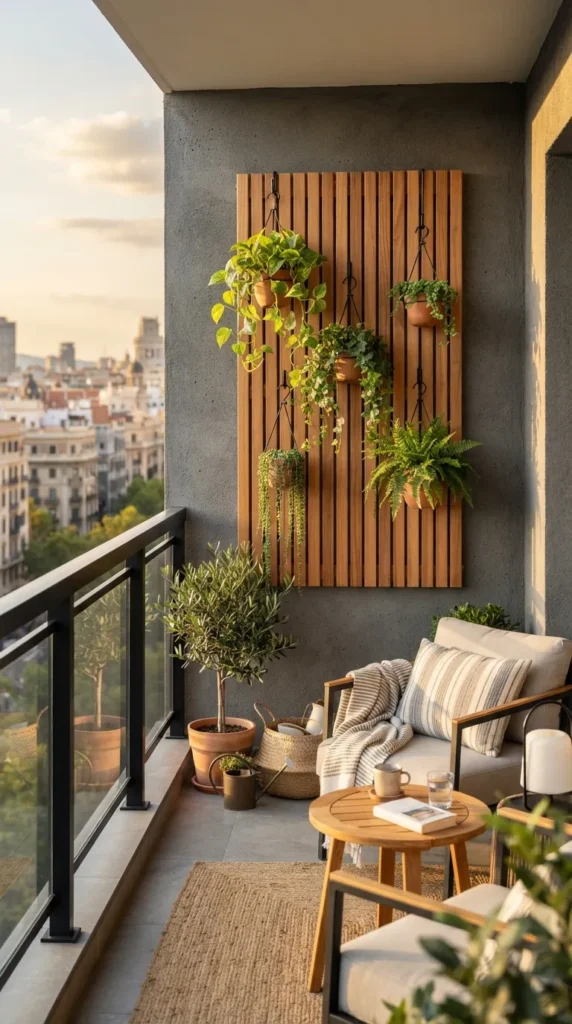
1. Floating Wooden Slat Wall & Hanging Planters
What This Idea Means
A floating wooden slat wall is a vertical decor structure mounted against an outdoor wall. It utilizes vertical space to create a modern focal point using clean, architectural wood lines while keeping the floor completely clear.
How to Make It
- Measure your wall area and source pressure-treated pine or cedar furring strips.
- Stain or paint the wood strips using a weather-resistant exterior wood finish.
- Secure two vertical support beams to your masonry or brick wall using masonry screws.
- Nail or screw the horizontal slats across the support beams, maintaining a uniform gap (approx. 1 inch) using a spacer block.
- Attach S-hooks, wall brackets, or metal hose clamps directly onto the slats to suspend terracotta or ceramic pots.
Tips and Variations
- Renter Option: Build the slat frame onto a free-standing wooden pallet instead of mounting it directly to the wall.
- Variations: Paint the slats matte black for an ultra-modern aesthetic, or keep the natural wood finish for an organic, Scandinavian look. Mix dangling greenery like English Ivy or String of Pearls with practical potted herbs.
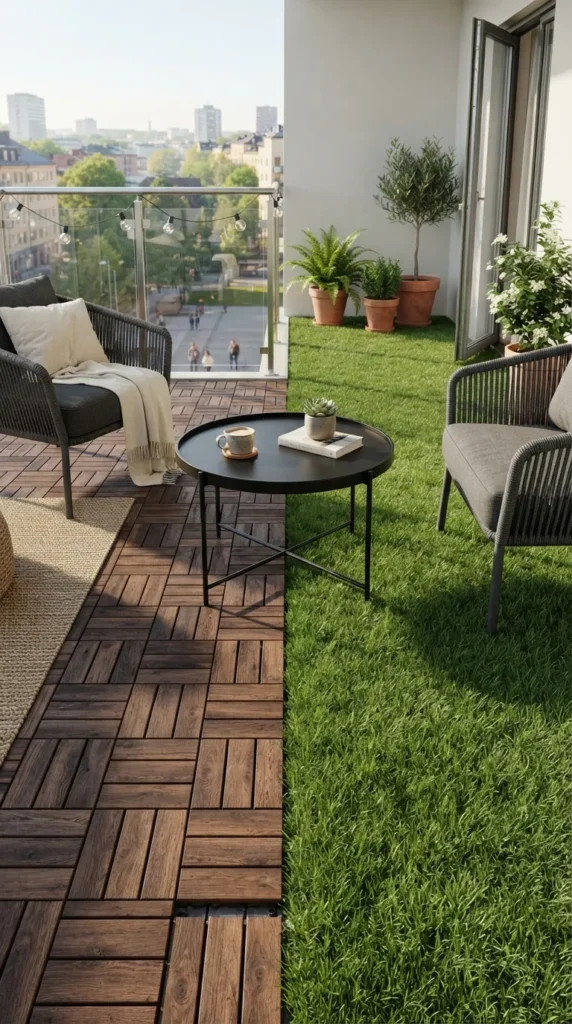
2. Artificial Turf & Interlocking Deck Tile Zoning
What This Idea Means
This idea combines soft, green artificial grass with wooden or composite interlocking deck tiles to visually split a plain concrete balcony floor into distinct “zones” (e.g., a green lounging corner and a wooden walkway).
How to Make It
- Sweep and thoroughly clean your existing concrete floor.
- Measure the balcony and sketch a simple grid layout showing where the grass section ends and the wooden tiles begin.
- Snap together interlocking acacia wood or composite deck tiles on one half of the balcony.
- Cut high-density outdoor artificial grass roll to fit the remaining floor space using a sharp utility knife.
- Place heavy planters along the seams to keep everything flat and seamlessly integrated.
Tips and Variations
- Maintenance: Ensure the deck tiles and artificial turf have built-in drainage holes or raised plastic grids underneath to allow rainwater to flow toward the floor drain easily.
- Variations: Instead of artificial turf, pair interlocking wood tiles with outdoor patterned stencil paint on the exposed concrete section for a bold tile contrast.
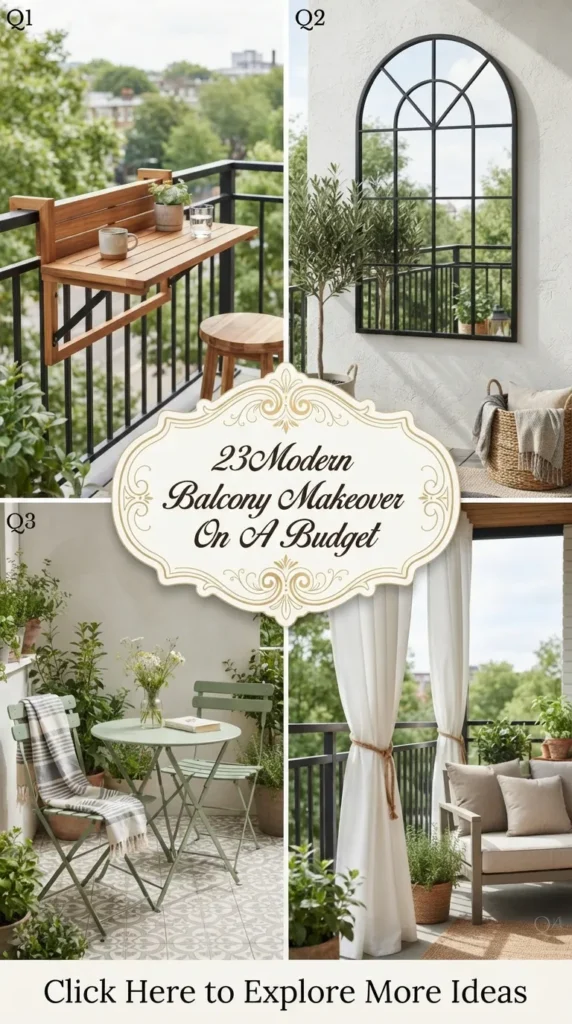
3. Railing-Mounted Foldaway Bar Table
What This Idea Means
A foldaway bar table attaches directly to the balcony railing, serving as a functional dining ledge or remote work spot without occupying valuable floor space when not in use.
How to Make It
- Cut a solid piece of outdoor-rated wood (such as teak or sealed pine) to your desired length (typically 3 to 4 feet long and 10 to 12 inches deep).
- Apply an exterior-grade clear sealant or waterproof paint to protect the wood from UV rays and rain.
- Secure metal drop-leaf folding brackets to the underside of the board.
- Mount the brackets directly onto the vertical posts of your metal balcony railing using heavy-duty U-bolts or specialized railing mounts.
- Test the drop mechanism to ensure the table folds down flat against the railing when not needed.
Tips and Variations
- Styling: Pair with two sleek, stackable bar stools that can be tucked away in a corner.
- Variations: Add a shallow front lip or raised edge to prevent coffee cups, phones, or stationery from sliding off the edge.
4. Cozy Floor Cushion Lounge with Pallet Base
What This Idea Means
This low-profile seating solution uses upcycled shipping pallets topped with outdoor floor cushions, creating a laid-back, lounge-style aesthetic popular in modern bohemian and Mediterranean homes.
How to Make It
- Source two or four wooden shipping pallets of equal size (often available for free or cheap from local hardware stores).
- Sand down all rough edges thoroughly to prevent splinters.
- Paint or stain the pallets in a color of your choice (e.g., crisp white, deep charcoal, or natural walnut).
- Stack two pallets on top of each other for standard height and secure them together with flat metal brackets.
- Top with weather-resistant outdoor seat cushions and pile on tufted accent pillows.
Tips and Variations
- Storage Hack: Use the hollow spaces inside the pallets as shoe slots or to tuck away flat storage trays.
- Variations: Add caster wheels with locking brakes to the bottom of the pallet base to make it easy to move around during cleaning.
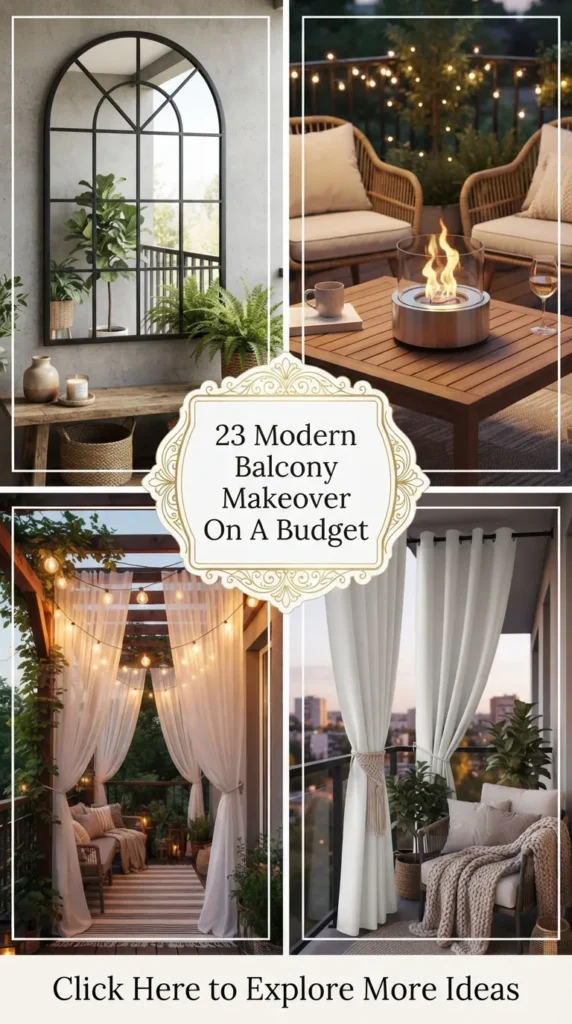
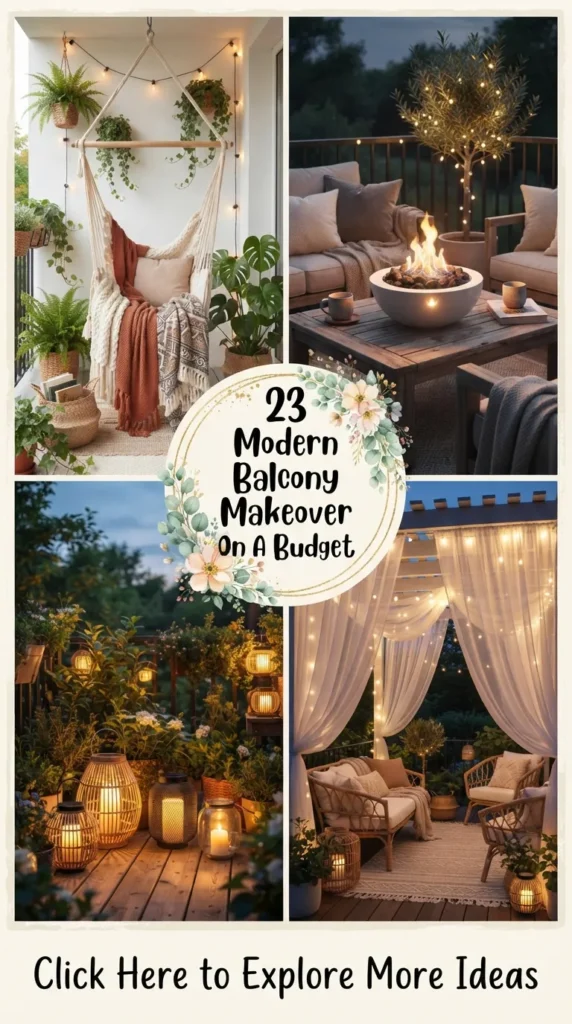
5. String Lights & Overhead Sheer Canopy
What This Idea Means
An overhead canopy made from weather-resistant sheer fabric combined with warm LED string lights brings dreamy, soft illumination and privacy to exposed urban balconies.
How to Make It
- Install removable exterior adhesive hooks or heavy-duty tension rods across the ceiling or top frame of the balcony.
- Drape lightweight, semi-sheer outdoor curtain panels loosely across the rods to form gentle swags.
- Weave commercial-grade outdoor Edison bulb string lights along the perimeter of the ceiling and down through the fabric folds.
- Secure light cords neatly along corners using clear zip ties or wall clips.
Tips and Variations
- Power Source: Use solar-powered or USB-rechargeable LED string lights if your balcony lacks an outdoor electrical outlet.
- Variations: Swap out plain white string lights for warm curtain lights hung flat against the back wall to create a sparkling, vertical drop-light effect.



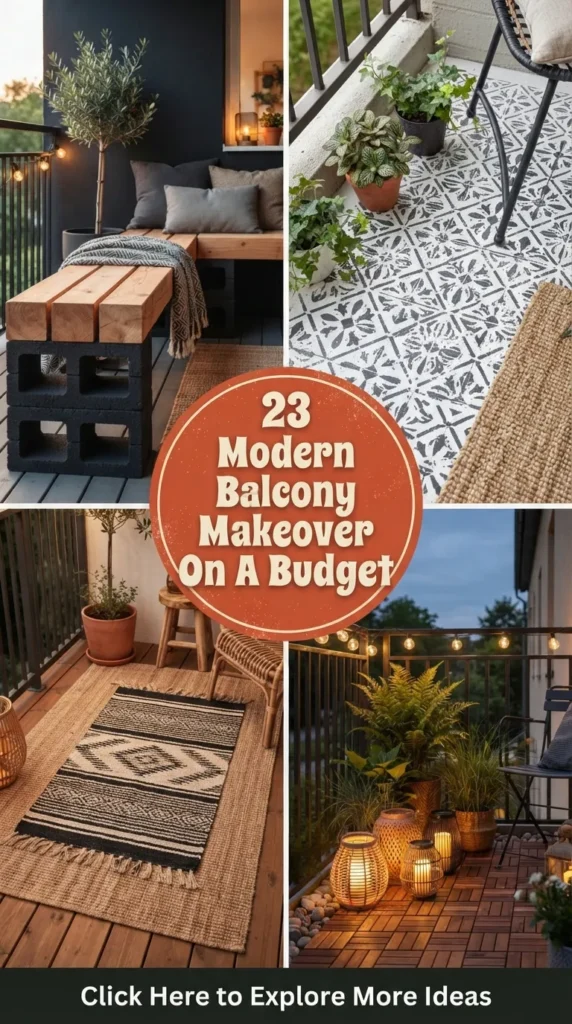
6. DIY Concrete Block & Wood Bench
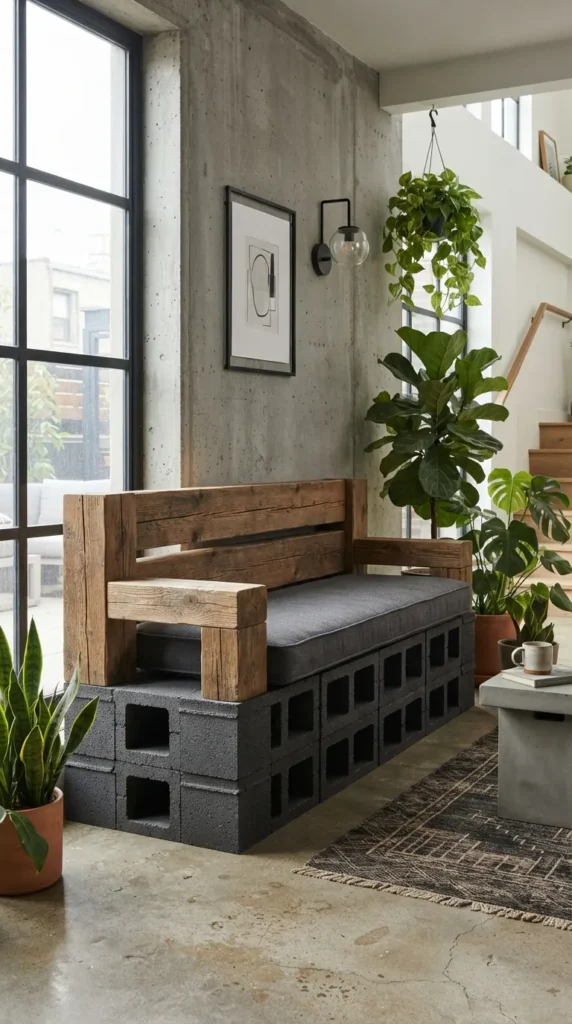
What This Idea Means
An industrial-modern seating bench made by stacking standard cinder blocks and threading thick wooden posts horizontally through the block openings.
How to Make It
- Purchase 12 to 14 standard cinder blocks and 4 thick square timber beams (e.g., 4×4 lumber cut to 4 or 5 feet).
- Paint the cinder blocks using a matte exterior masonry paint (like dark charcoal or off-white).
- Sand and seal the timber beams with a waterproof varnish.
- Place the cinder blocks vertically on their sides at both ends of the desired seating area, gluing them together with construction adhesive for stability.
- Slide the timber posts through the open rectangular holes of the blocks to form the seat base.
- Top with a tailored bench cushion.
Tips and Variations
- Multi-purpose: Plant small succulents or herbs inside the top exposed openings of the cinder blocks for built-in greenery.
- Variations: Leave the blocks unpainted for an industrial, raw-concrete look paired with warm cedar wood.
7. Vertical Herb Garden with Upcycled Canvas Shoe Organizer
What This Idea Means
A space-maximizing culinary garden made by re-purposing a hanging canvas pocket organizer into a vertical planter for fresh kitchen herbs.
How to Make It
- Acquire a heavy-duty fabric or canvas shoe organizer (preferably made from breathable canvas or felt material).
- Mount the organizer securely onto a sunny wall or over the inside of the balcony railing using S-hooks or grommets.
- Line each pocket with small plastic sandwich bags perforated at the bottom for drainage, or use pot liners.
- Fill each pocket with lightweight potting mix mixed with perlite.
- Plant small herb starts (mint, basil, thyme, rosemary, cilantro) into individual pockets.
Tips and Variations
- Drainage Management: Ensure the bottom pockets drop excess water freely, or place shallow plant saucers beneath the lowest tier to catch runoff.
- Variations: Label each pocket using waterproof wooden garden markers or chalkboard tags.
8. Stenciled Concrete Floor Transformation
What This Idea Means
Instead of purchasing expensive tile covering, this technique uses durable exterior porch and floor paint along with a large geometric stencil to mimic expensive patterned tile over plain concrete.
How to Make It
- Thoroughly scrub the balcony concrete floor using a degreaser, rinse completely, and let dry for 24 hours.
- Apply a base coat of exterior porch paint (e.g., bright white or soft gray) using a roller and allow to dry.
- Secure your chosen plastic design stencil to the floor using painter’s tape.
- Apply a contrasting paint color (e.g., dark slate or navy) over the stencil using a dense foam roller, using minimal paint to avoid bleeding.
- Repeat the pattern across the floor, let dry, and seal with a clear outdoor polyurethane topcoat.
Tips and Variations
- Precision: Keep paper towels nearby to wipe the back of the stencil between applications to keep lines crisp.
- Variations: Try a classic checkerboard design using painter’s tape instead of a geometric stencil for a timeless bistro vibe.
9. Outdoor Bamboo Privacy Screen Panel
What This Idea Means
A natural bamboo or reed fencing screen attached along the inside of transparent or open balcony railings to provide instant privacy and wind protection with a tropical twist.
How to Make It
- Measure the height and total length of your balcony railing.
- Purchase rolled bamboo or reed fencing corresponding to your railing height.
- Unroll the bamboo screen tightly along the interior side of the railing.
- Secure the screen to the vertical railing bars at regular intervals (top, middle, and bottom) using heavy-duty, outdoor-rated zip ties in a matching tone.
- Trim any excess length at the end using heavy wire cutters or a hand saw.
Tips and Variations
- Longevity: Treat natural bamboo with a clear outdoor UV protection coat once a year to prevent fading or weathering.
- Variations: Attach artificial ivy hedge panels instead of bamboo if you prefer a lush green privacy wall year-round.
10. Minimalist Bistro Set Makeover
What This Idea Means
Revamping an affordable or secondhand metal bistro table and two chairs using high-durability spray paint and custom seat cushions for an elegant café-style setup.
How to Make It
- Find an inexpensive metal bistro set (new or thrifted).
- Lightly sand all surfaces to remove rust or flaking old paint, then wipe clean.
- Apply a coat of rust-inhibiting outdoor metal primer.
- Spray paint the set using thin, even coats of a modern hue like sage green, terracotta, matte black, or mustard yellow.
- Add weather-resistant round seat cushions tied securely to the chair backs.
Tips and Variations
- Space Saving: Choose a bistro set with folding chairs and a drop-leaf table so everything can lean flat against the wall during bad weather.
- Variations: Wrap the chair backs with natural jute cord using macramé knots for added texture and comfort.



11. Built-In Corner Storage Bench
What This Idea Means
A customized, L-shaped or single corner bench with a lift-up top lid, providing high-capacity storage for outdoor cushions, gardening tools, and extra blankets while creating ample seating.
How to Make It
- Construct a simple box frame out of 2×4 lumber tailored to fit the exact dimensions of your balcony corner.
- Clad the sides of the frame with exterior plywood, tongue-and-groove planks, or cedar siding.
- Attach a solid plywood lid to the top using stainless steel piano hinges or butt hinges.
- Seal all exterior wood surfaces with a waterproof stain or outdoor paint.
- Add rubber weather-stripping along the inside rim of the lid to protect contents from rain moisture.
Tips and Variations
- Comfort: Top the box lid with a thick custom foam bench pad wrapped in solution-dyed acrylic fabric.
- Variations: Use pre-assembled wooden storage crates joined together if you prefer not to build the frame from scratch.
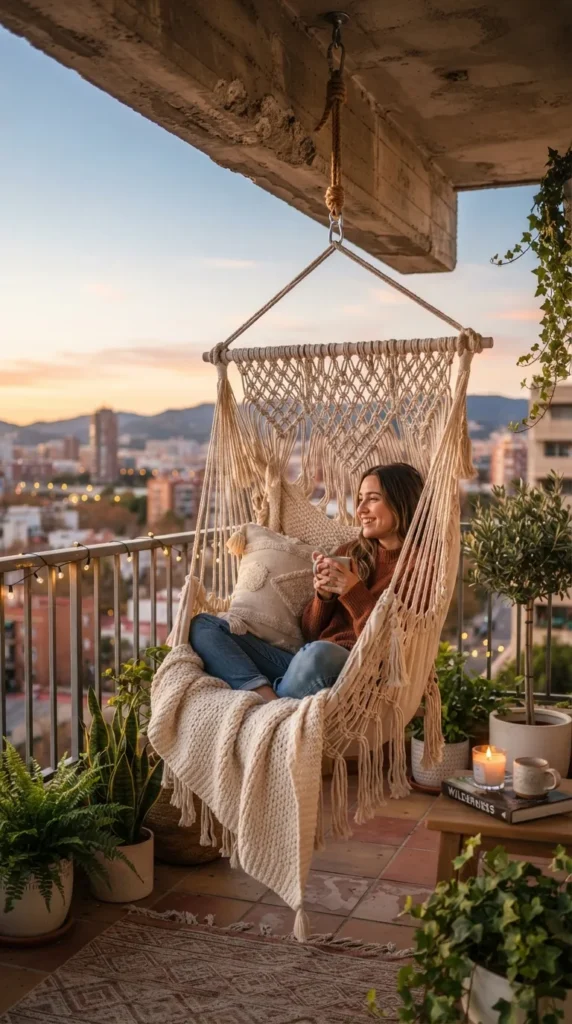
12. Hanging Macramé Hammock Chair Corner
What This Idea Means
A suspended macramé woven chair anchored from a sturdy concrete balcony ceiling beam (or a compact free-standing C-stand) to create a weightless reading nook.
How to Make It
- Locate a solid concrete ceiling beam or structural joist overhead (ensure structural safety and lease compliance).
- Drill a hole and install a heavy-duty stainless steel anchor bolt with an expansion sleeve designed for outdoor overhead loads.
- Attach a heavy-duty carabiner and a strong outdoor extension spring to reduce tension when sitting down.
- Suspend the macramé hammock chair ring securely onto the spring hook.
- Dress the chair interior with a fluffy throw pillow and a soft outdoor blanket.
Tips and Variations
- Renter Friendly: Use a compact metal hammock chair stand if overhead drilling is not allowed.
- Variations: Hang a traditional fabric swing hammock along the length of the balcony if space allows.
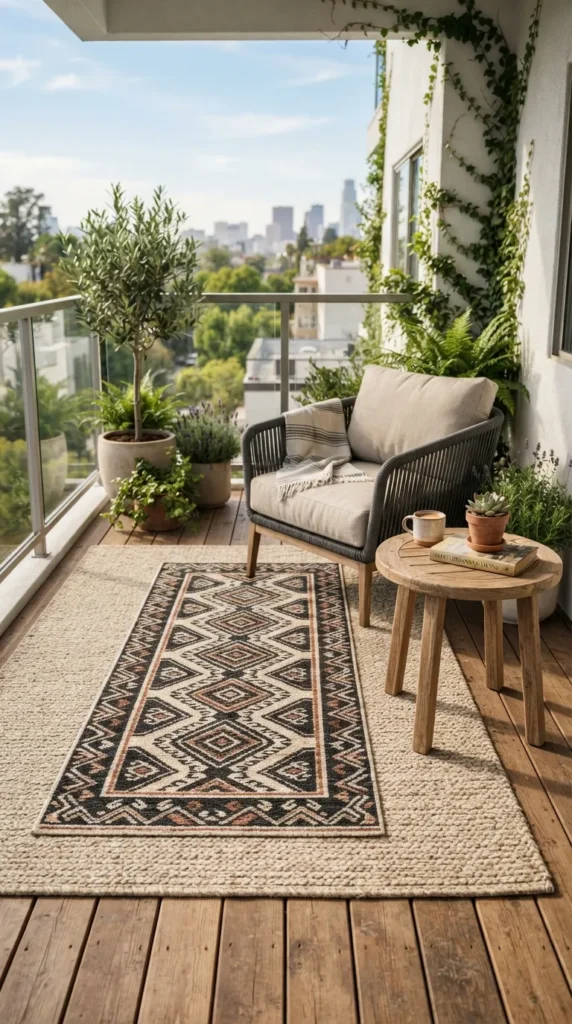
13. Layered Outdoor Rug Decking
What This Idea Means
Styling two distinct outdoor rugs—a larger base rug in a subtle texture combined with a smaller, bolder accent rug—to soften the floor texture and define distinct seating spaces.
How to Make It
- Choose a large, flat-weave polypropylene base rug that covers most of the balcony floor (e.g., natural jute-look synthetic weave).
- Lay the base rug flat, anchoring the corners with heavy furniture or planter pots.
- Select a smaller accent rug featuring a modern motif, geometric line art, or vibrant pop of color.
- Place the accent rug at an angle or directly under the central coffee table or lounge area to create dimensional layers.
Tips and Variations
- Material Care: Ensure both rugs are explicitly rated 100% polypropylene for outdoor use so they dry quickly after rain and resist mildew.
- Variations: Use a runner-style outdoor rug along narrow balconies to visually lengthen the spatial perspective.
14. Wall-Mounted Drop-Down Workspace & Plant Shelf
What This Idea Means
A multi-functional vertical unit that serves as a decorative plant wall during off-hours and folds down into an outdoor laptop desk when working from home.
How to Make It
- Build or buy a shallow wooden shadow-box frame with fixed interior shelves.
- Attach a hinged outer board to the bottom shelf that can lift up and lock into place horizontally via folding bracket arms or side chains.
- Mount the entire unit securely to your exterior wall using wall anchors.
- Display small potted succulents, framed art, and decorative items on the top fixed shelves.
- Unclasp the front board to lower the tabletop surface for laptop work.
Tips and Variations
- Cable Management: Cut a neat wire grommet hole near the back of the folding shelf to feed device charging cables down easily.
- Variations: Paint the front face of the closed drop-down panel with exterior chalkboard paint to write daily reminders or welcome messages.
15. Tiered Plant Ladder Display
What This Idea Means
A 3-tier or 4-tier wooden ladder unit positioned against a side wall, allowing plant lovers to collect and organize dozens of potted plants across multiple heights without crowding floor space.
How to Make It
- Repurpose an old wooden step ladder or assemble a lightweight A-frame ladder plant stand.
- Sand down rough timber and apply two coats of clear waterproof exterior sealer or dark wood stain.
- Span wide wooden planks across matching steps of the ladder to create broad, stable display shelves.
- Arrange your plant collection strategically: place light-loving succulents on the top tiers and shade-tolerant foliage on lower shelves.
Tips and Variations
- Stability: Anchor the top of the ladder stand to the wall with small L-brackets to prevent it from tipping over in strong winds.
- Variations: Attach clip-on solar grow lights under each tier to illuminate your plant display after dark.


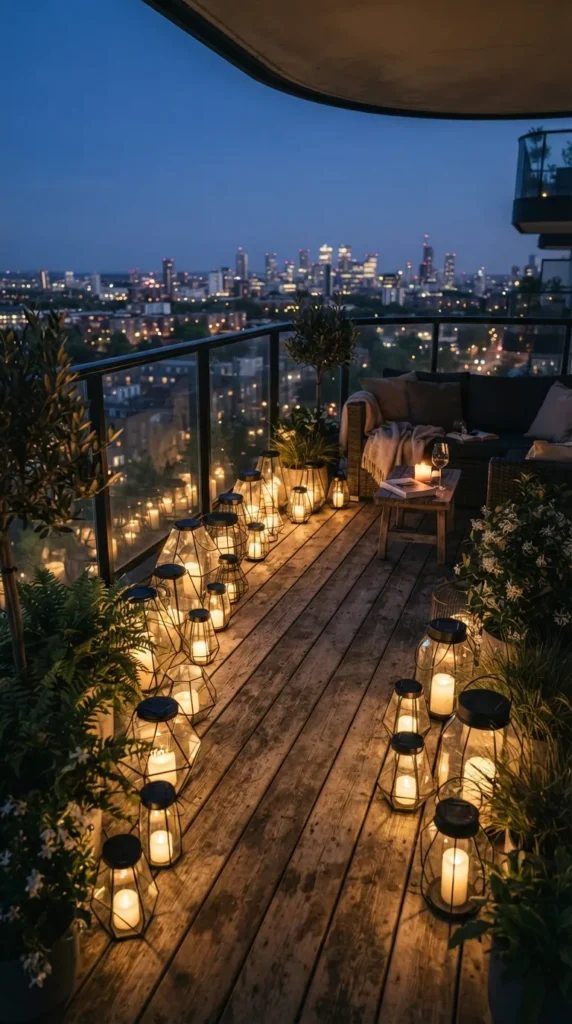
16. Low-Voltage Solar Lantern Pathway & Perimeter Lighting
What This Idea Means
An ambient lighting strategy that uses a collection of wireless solar lanterns placed at floor level along the edges of the balcony floor to outline the perimeter in warm light.
How to Make It
- Gather 4 to 8 solar-powered outdoor lanterns of varying sizes featuring glass, rattan, or open wire frames.
- Ensure all lanterns are equipped with warm-white (2700K) flickering LED candle inserts or warm LED bulbs.
- Position the largest lanterns in corner pockets next to tall planters.
- Line up medium and small lanterns along the base of the railing or along the edge of the floor decking.
- Position the solar collectors where they catch direct sunlight during the daytime hours.
Tips and Variations
- Visual Appeal: Group lanterns in odd numbers (sets of 3) at varying heights for a professional interior design look.
- Variations: Mix floor lanterns with small solar-powered jar lights suspended along the railing using twine or metal hooks.
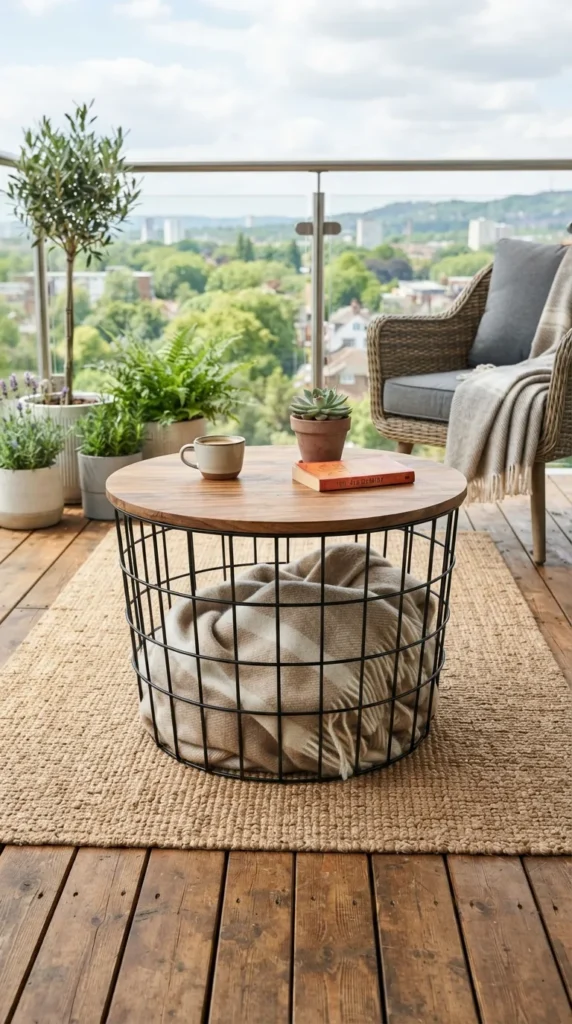
17. Waterproof Storage Coffee Table Hack
What This Idea Means
Transforming a standard plastic or metal wire basket into a double-duty accent table that provides hidden interior storage for outdoor throw blankets, outdoor games, or garden accessories.
How to Make It
- Acquire a wire drum basket or heavy-duty outdoor plastic tub with a clean geometric silhouette.
- Measure the top diameter of the vessel.
- Cut a circular tabletop piece out of 3/4-inch exterior-grade plywood or teak wood.
- Sand the wood smooth and seal it thoroughly with a waterproof clear coat.
- Router a shallow channel into the underside of the wood circle (or attach small plastic stops) so it fits snugly like a lid on top of the container base without sliding.
Tips and Variations
- Weatherproof Protection: Place items inside a clear zip-top waterproof bag inside the basket before closing the wooden top lid if the basket frame is open wire.
- Variations: Paint the wire basket in gold, black, or copper metallic spray paint for a high-end luxury feel.
18. Framed Outdoor Mirrors for Spatial Illusion
What This Idea Means
Hanging an outdoor-rated mirror on the end wall of a narrow or small balcony to bounce light, reflect surrounding greenery, and create the optical illusion of double the floor space.
How to Make It
- Source a framed mirror with an aluminum, plastic, treated wood, or wrought iron frame that can withstand moisture.
- Apply a thin line of clear silicone sealant around the seam where the mirror glass meets the frame back to prevent water ingress.
- Mount the mirror securely onto the side masonry wall at eye level using heavy-duty masonry anchors or sturdy picture hooks.
- Position plant foliage directly opposite the mirror so the reflection doubles the visual green impact.
Tips and Variations
- Safety First: Avoid placing mirrors in locations where direct, concentrated sunlight might reflect into flammable materials or interior windows.
- Variations: Use an arch-window pane style mirror frame to evoke the feeling of a garden window opening up to another room.
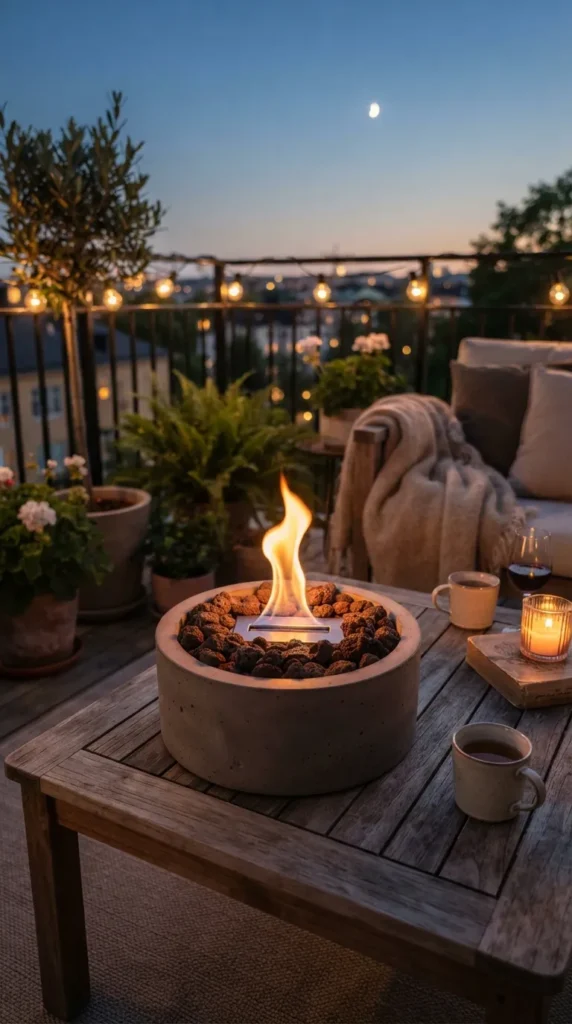
19. DIY Tabletop Bioethanol Fire Bowl
What This Idea Means
A compact, smokeless fire feature built in a decorative concrete planter bowl that can sit safely on a balcony coffee table to provide warmth and ambiance during cool evenings.
How to Make It
- Purchase a wide, shallow, heavy concrete planter bowl (approx. 10 to 12 inches wide).
- Place a small, clean stainless steel metal canister (like a clean empty metal paint cup or gel fuel can) in the exact center of the bowl.
- Fill the surrounding space around the metal canister with smooth river rocks, volcanic lava stones, or glass fire beads to secure it in place.
- Pour clean-burning liquid bioethanol fuel into the center metal canister.
- Light carefully using a long fireplace lighter.
Tips and Variations
- Safety: Never attempt to refill the canister while lit or hot. Always keep a snuffer lid nearby to extinguish the flame instantly.
- Variations: Top the surrounding stones with small decorative glass rocks that sparkle when the central flame catches them.
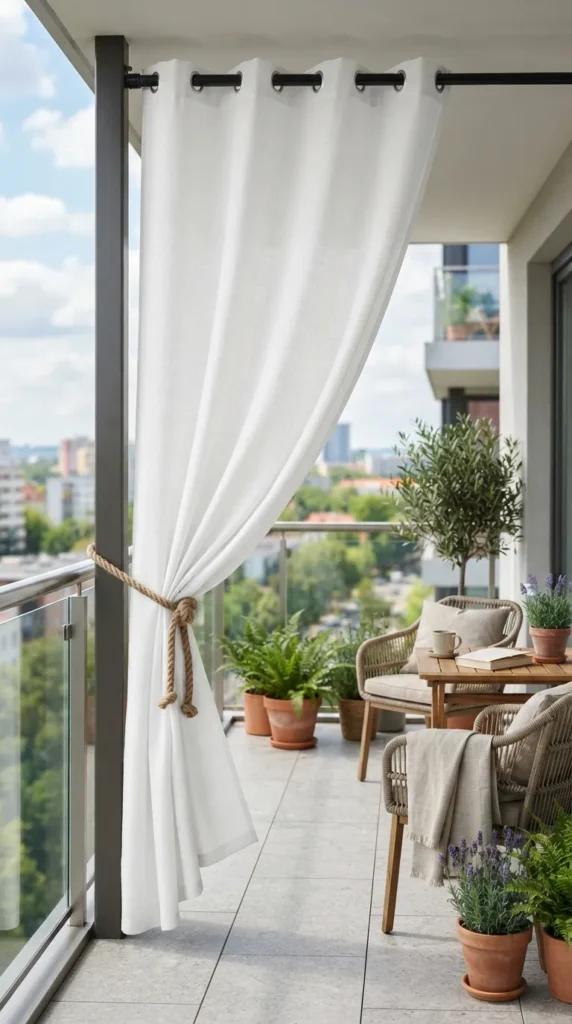
20. Vertical Hanging Fabric Pocket Privacy Curtain
What This Idea Means
Installing full-height outdoor curtain rods to hang weatherproof fabric panels along one or both side ends of the balcony, creating instant privacy from neighboring units and shading harsh side sun.
How to Make It
- Install an adjustable outdoor tension rod or mount regular metal curtain bracket hardware between the wall and outer balcony post.
- Select lightweight, water-repellent, mildew-resistant outdoor fabric curtains with top stainless steel grommets.
- Slide the curtain panels onto the rod and secure brackets tightly.
- Add heavy outdoor curtain weights or heavy glass beads into the bottom hem to prevent the fabric from blowing in the wind.
- Install a decorative wall tie-back hook on the side wall to hold curtains neatly open when desired.
Tips and Variations
- Wind Solution: Tie the curtains back loosely during strong storms, or choose grommeted curtains that clip at both top and bottom.
- Variations: Use semi-translucent linen-blend fabrics for soft filtered light, or thick canvas fabrics for total sightline blockage and wind protection.